In the previous tutorial you learned how to use Markdown to format your text. By now you’ve probably created a few files, which means you need to organize them and keep everything tidy. Writer can help you with that.
Using the Organizer
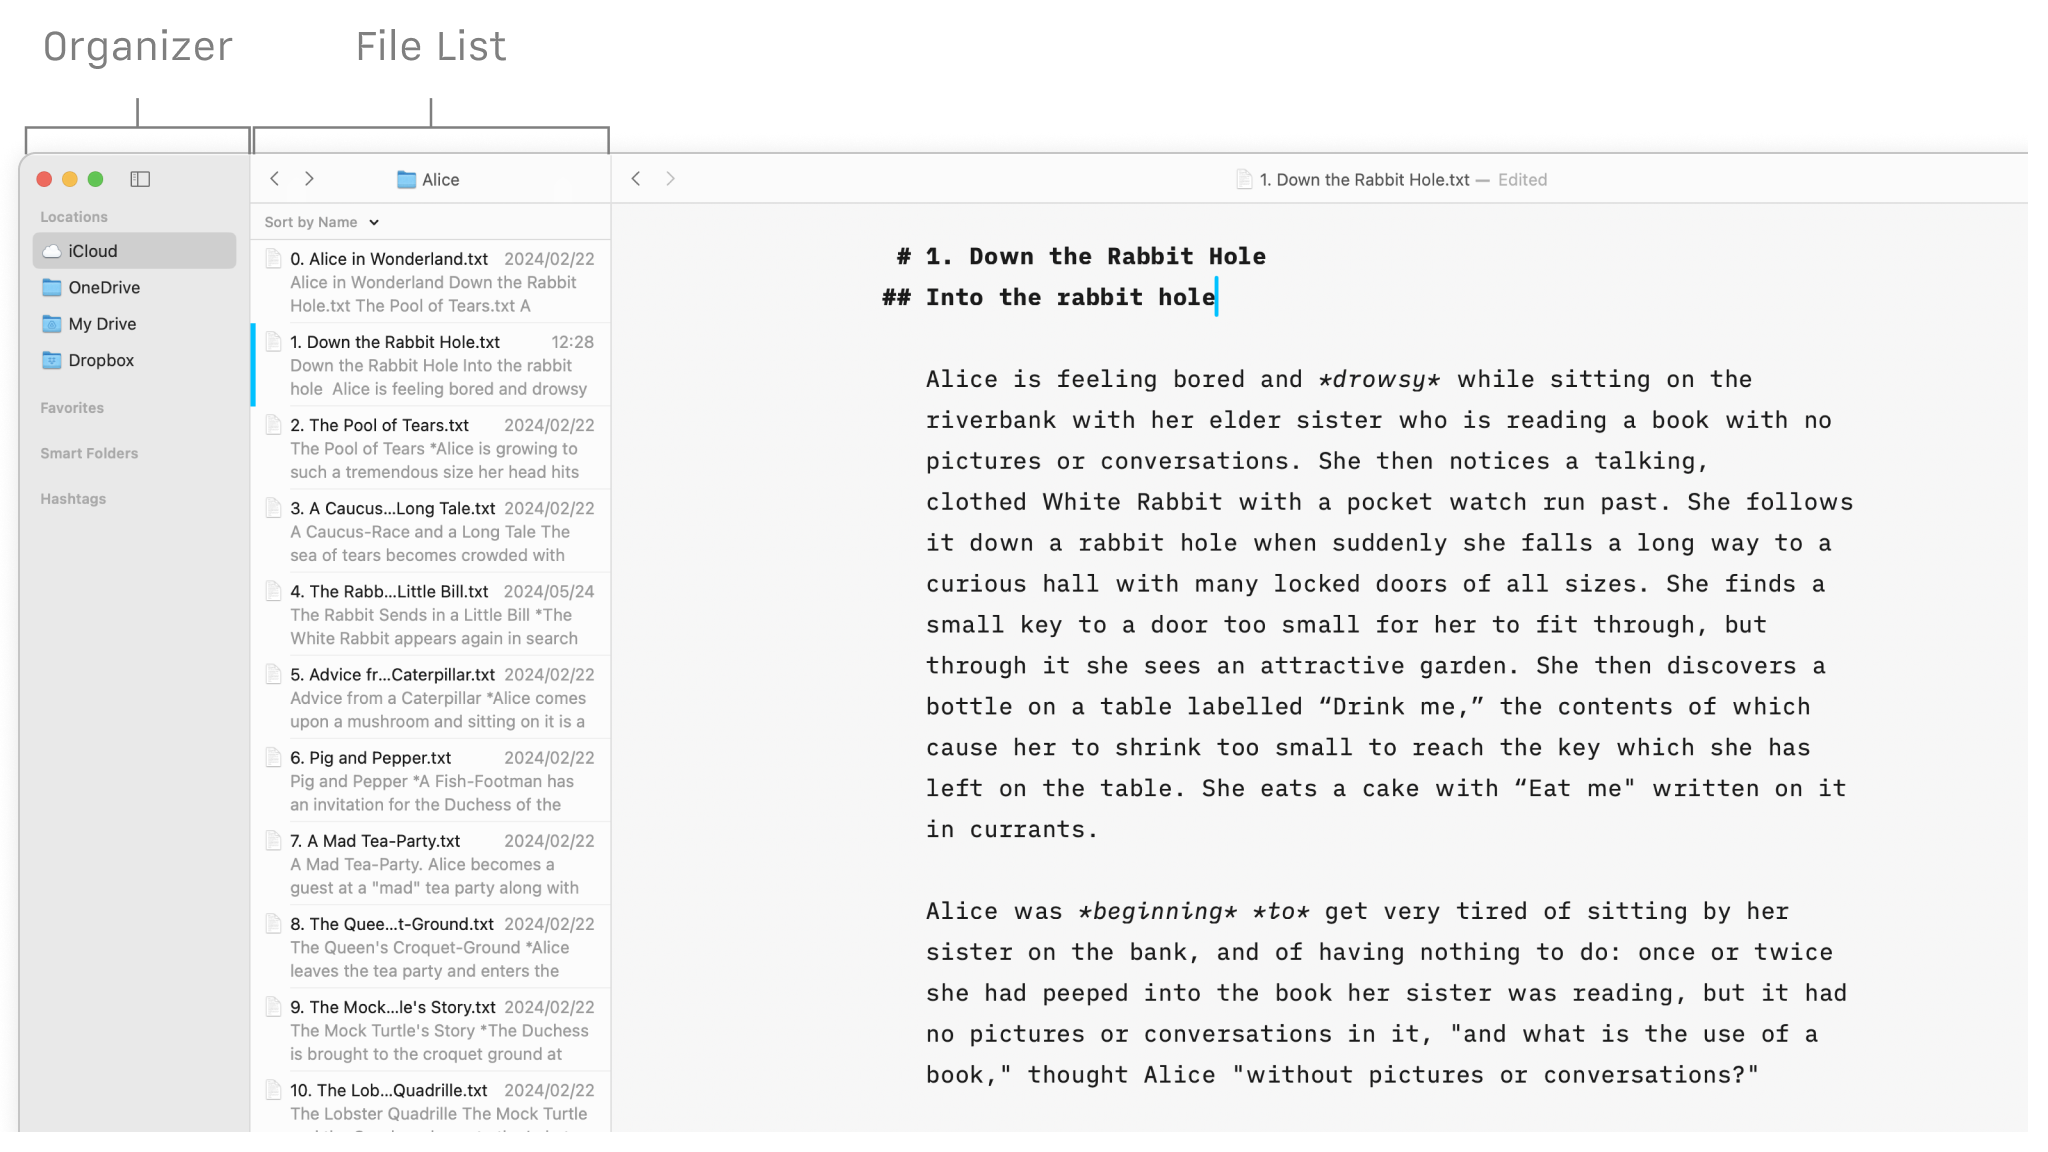
Let’s recap: In our Quick Tour tutorial we introduced the Library, which is made of two panels: the Organizer and the File List beside it.

Use the Organizer to add local folders on your device or link to Cloud Storage such as iCloud, Dropbox and Google Drive. You can also assign favorites, smart folders, and hashtags from here, and rename or remove folders.
When you select a folder in the Organizer, you’ll see all files and folders it contains in the File List. From here, you can navigate your files, sort them, or move or delete them using the contextual menu.
Learn more about organizing your files.
Link Your Thoughts
Want to connect your thoughts or ideas across different files? If you’re using Writer for Mac, iPhone & iPad, try creating some Wikilinks.
To link to another file, go to your text and start typing double square brackets [[ and closing brackets ]]. Then start entering the name of the file you want to link to. As you type the file name, Writer will try to autocomplete it for you. If that file doesn’t exist yet, Writer will create it.
Your completed Wikilink should look like this: [[Connected File Name]]
In the Editor, right-click on a Wikilink to open it—or left-click on it when you’re viewing the file in Preview. You can also use shortcuts to open Wikilinks, depending on which device you’re using.
Learn more about creating and using Wikilinks, and be sure to check out our release article too.
Combining Files
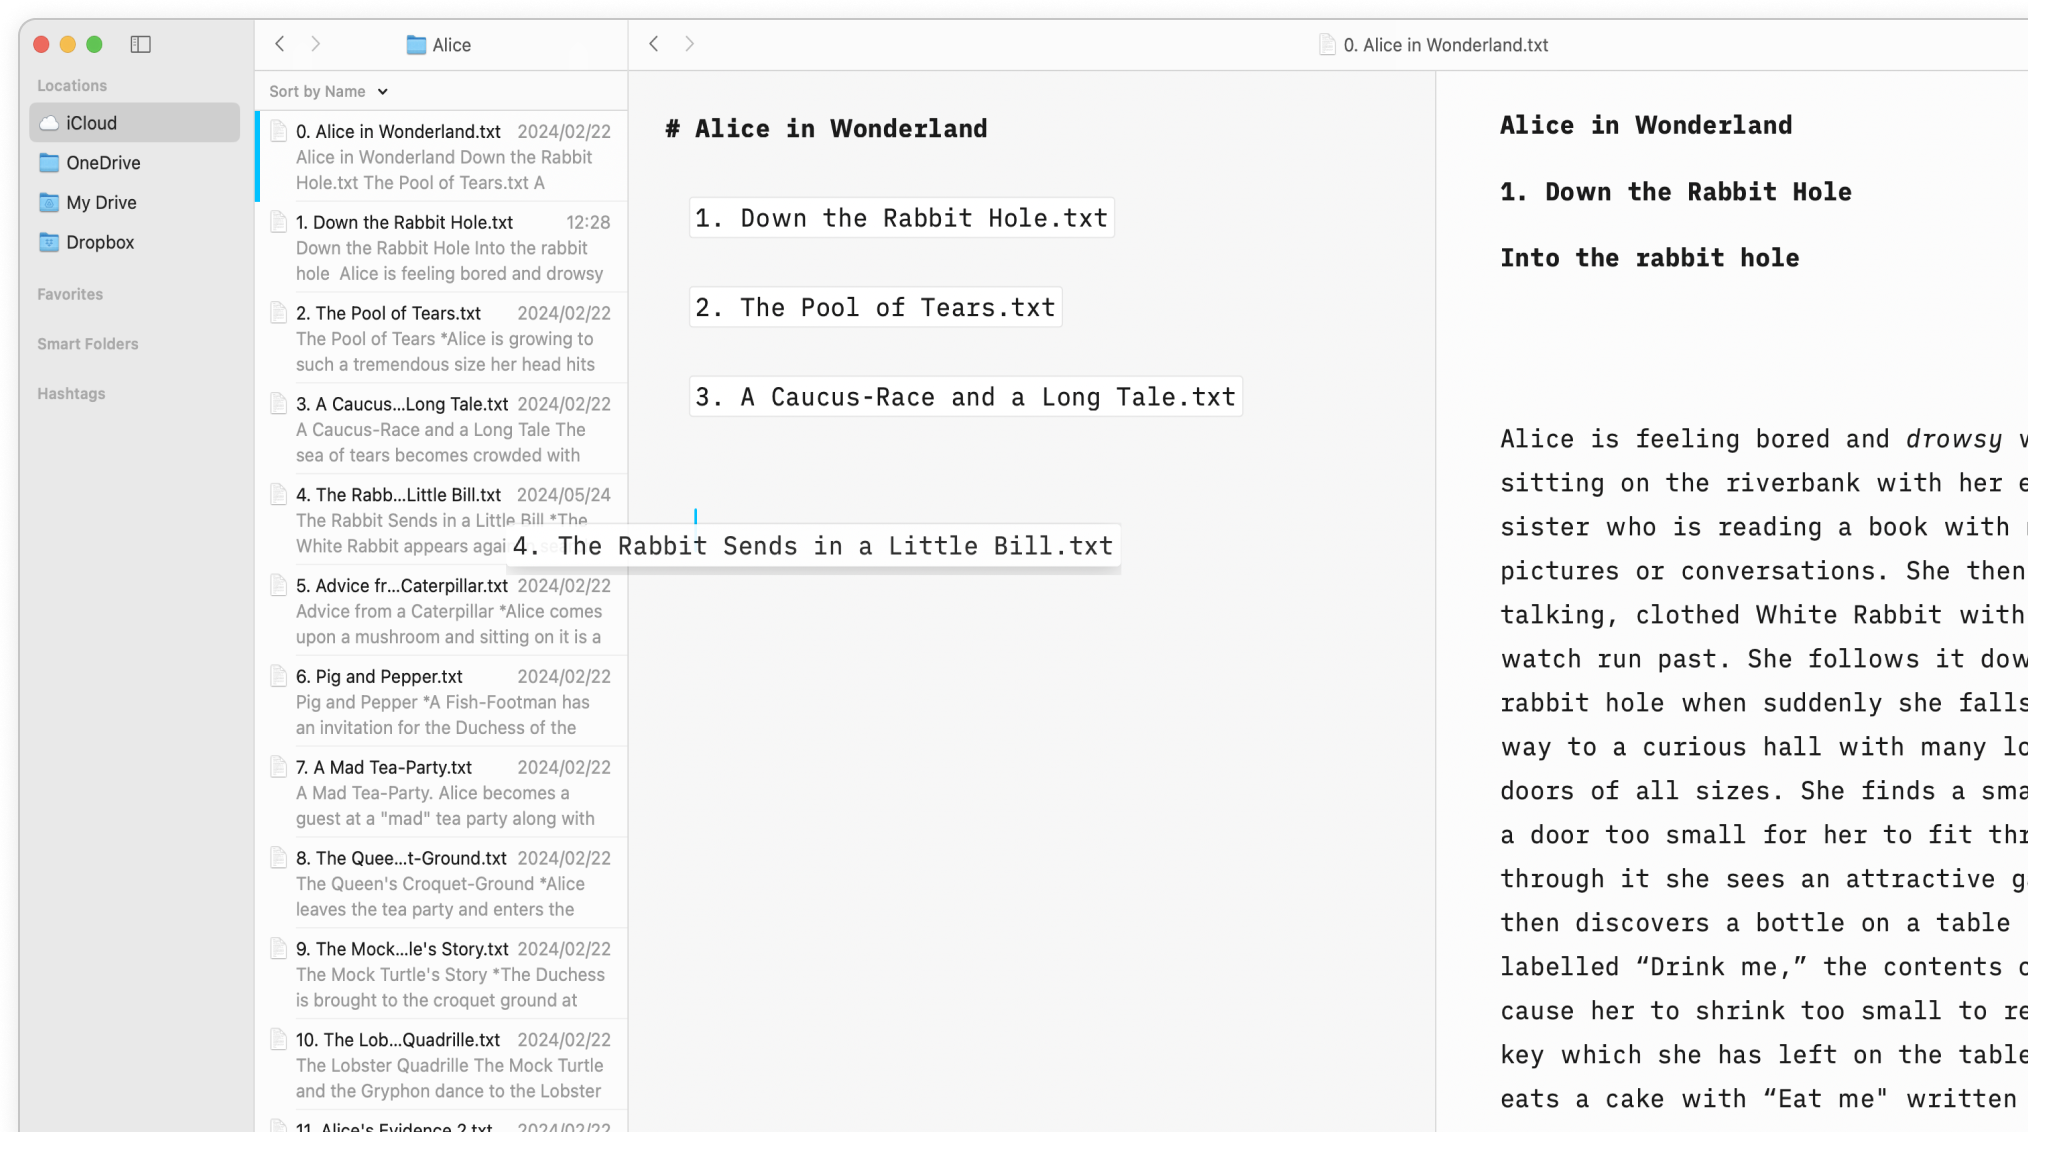
If you want to create a single document out of multiple files, like chapters in a novel for example, use Content Blocks.
Create a new document then drag-and-drop other files from the File List. You’ll only see the Content Block’s name in your new file in the Editor, but all its contents will be visible in Preview.

Browsing Large Files
Large files like a thesis or novel are typically difficult to navigate. Writer makes it easier.
Create a Table of Contents
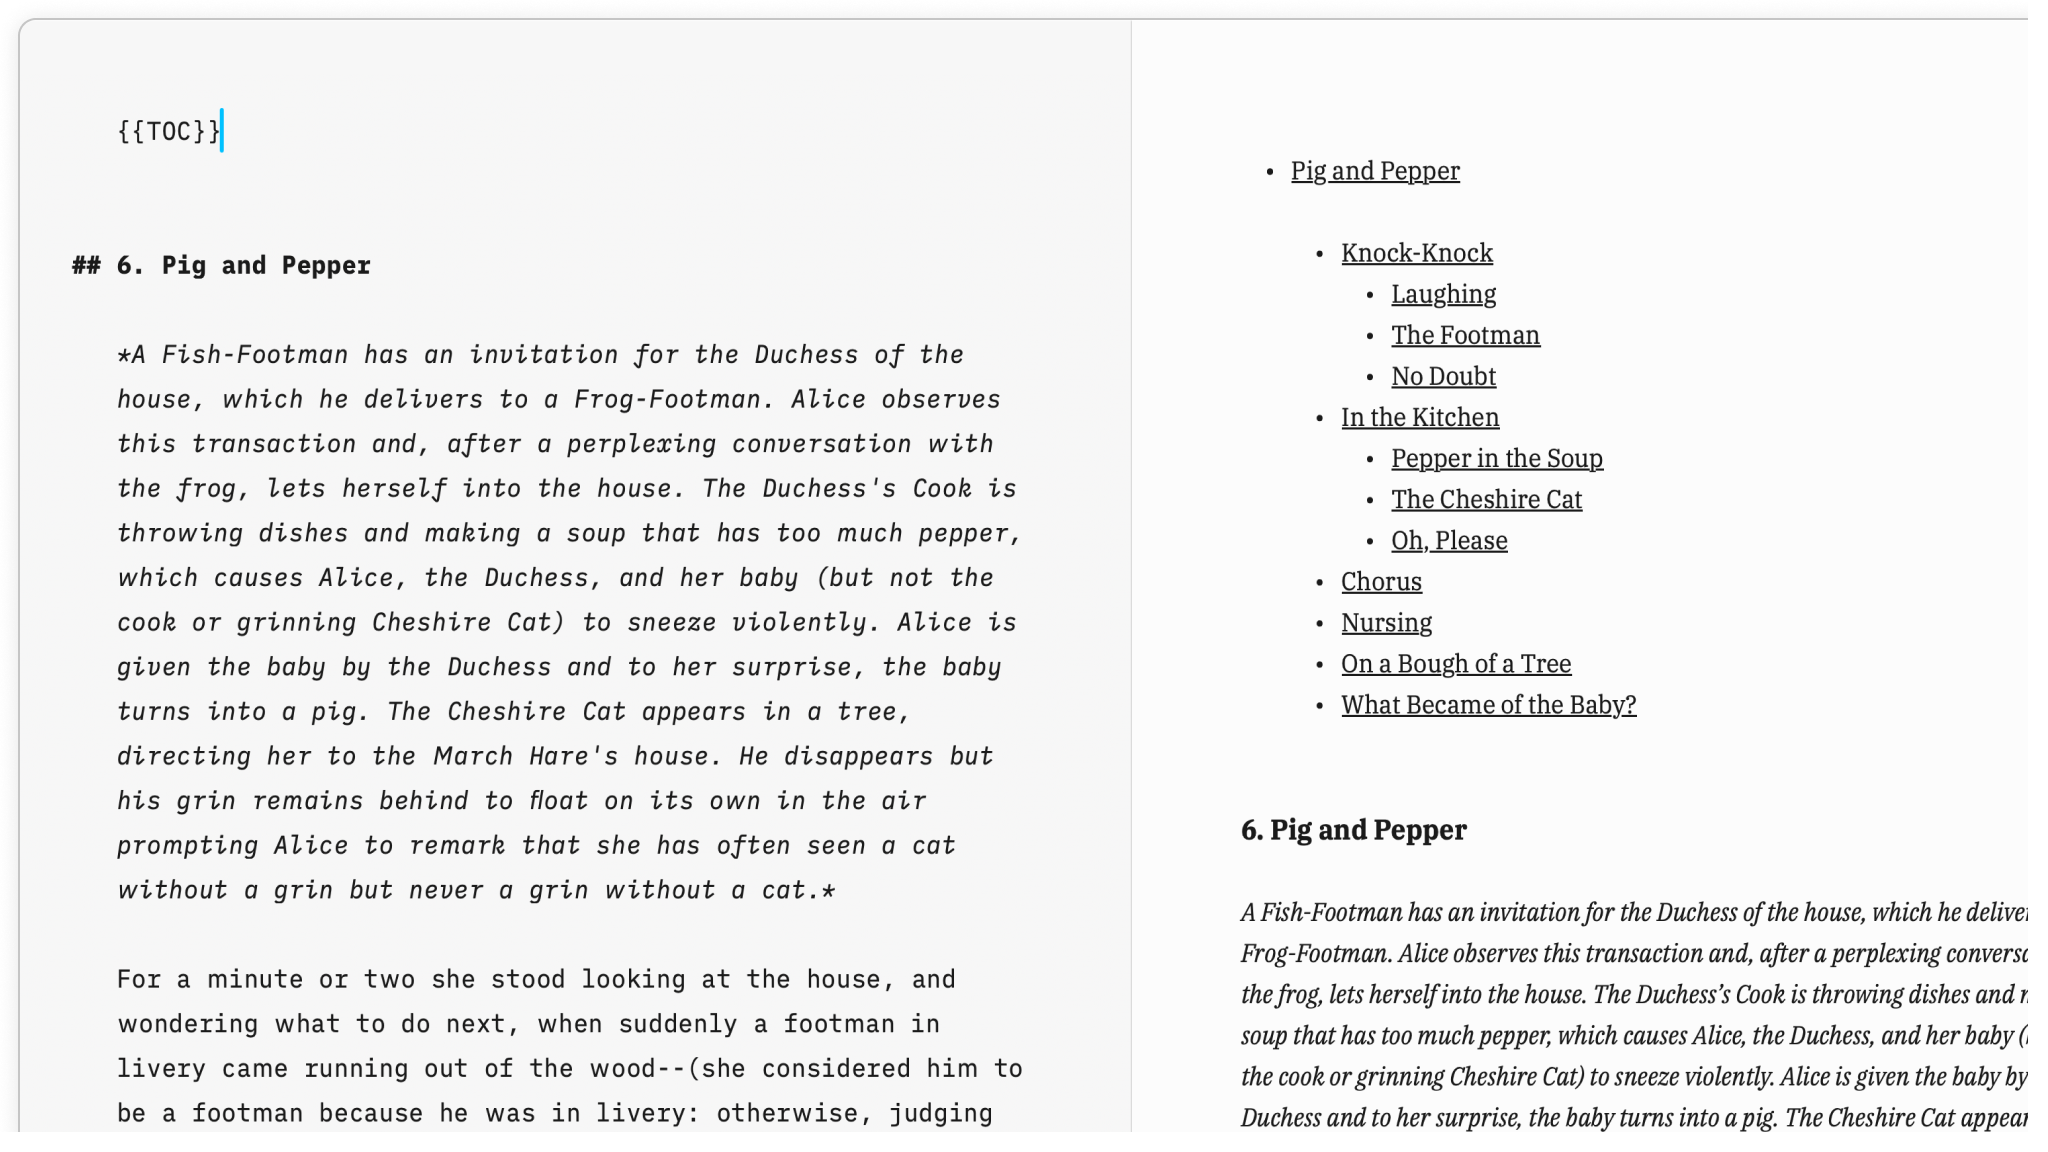
An easy way to navigate through a large file is by creating a table of contents using Markdown. Just add {{TOC}} wherever you want it to appear. Writer will automatically generate a table of contents based on the headings you already added to your document, which you can see in the Preview.

Outline and Expanding Chapters (Windows)
If you’re using Writer for Windows and are working on a file with multiple headings, you’ll see an outline in the File List on the left. Click on any heading in the outline to jump directly to that location.
And if you find your document is getting too long to navigate, simply click on a # heading to hide its contents. Click again to expand it.
Learn more about using Outline in Writer for Windows.
You now know how to organize, combine, link and navigate your files. In the next tutorial we’ll show you how to improve your writing style with Writer’s Syntax Highlight and Style Check features.

