iA Presenter works great when you’re presenting online—but what about on-site presentations? Let’s work through the options.
If you’re going to present on a setup that belongs to the host, be sure to find out in advance what software and hardware options are available at the venue. If you’re not sure, you should probably bring your own computer along.
Choose Extended Mode
Depending on the setup at the venue, you may be asked to choose between:
- Mirror/Clone Mode, where the same content is shown on both devices
- Extended Mode, where you choose what you show on the secondary display
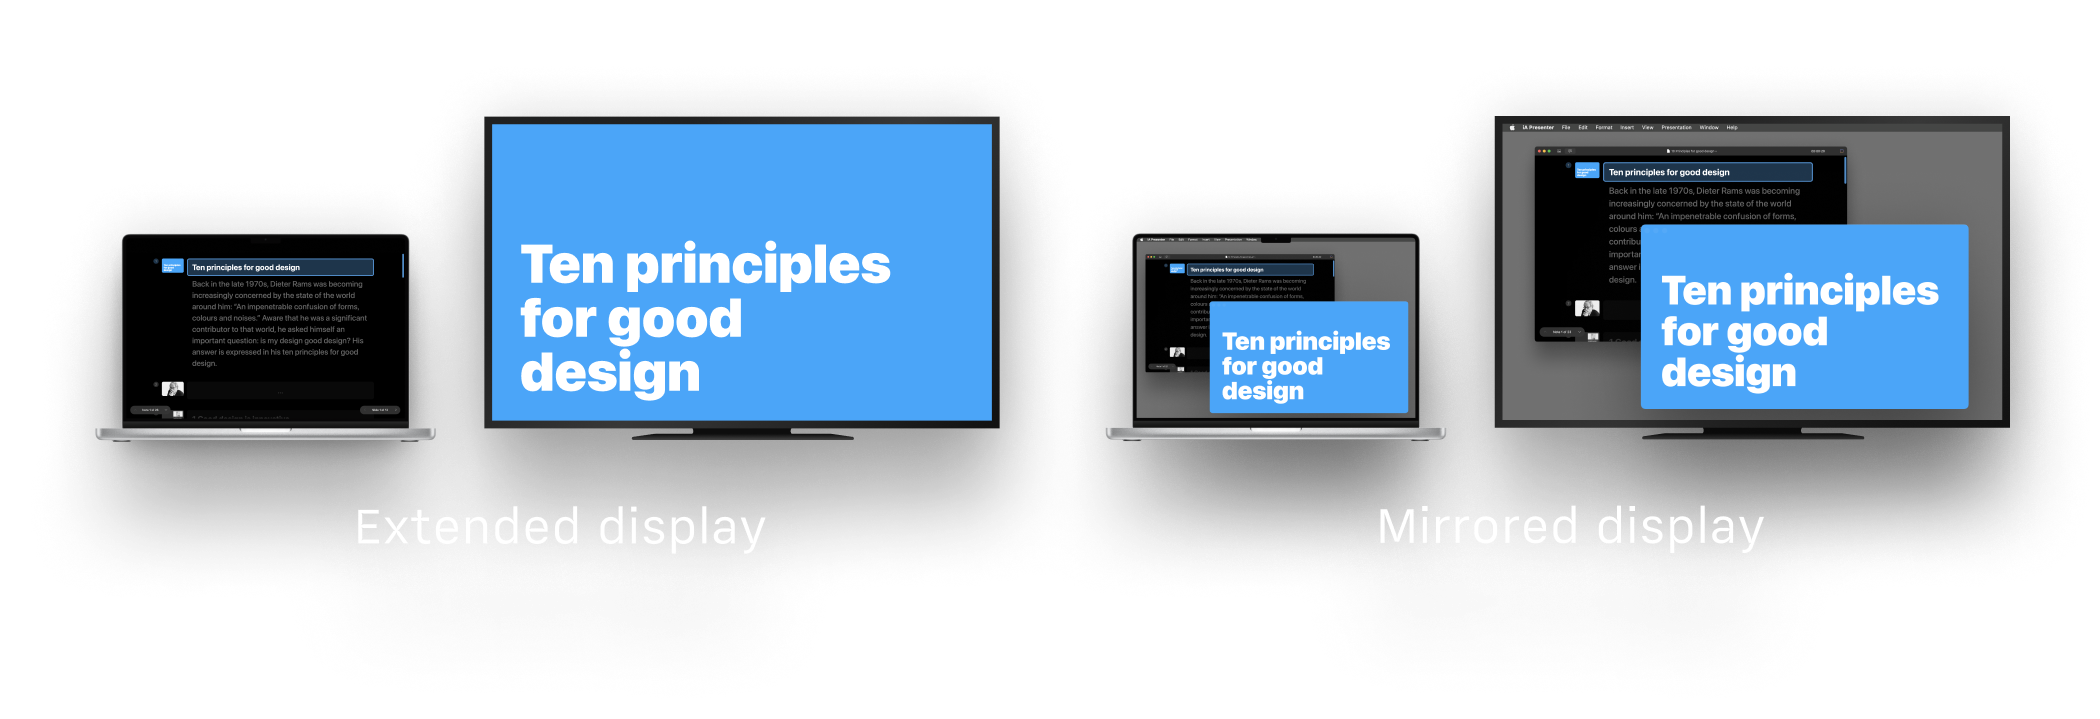
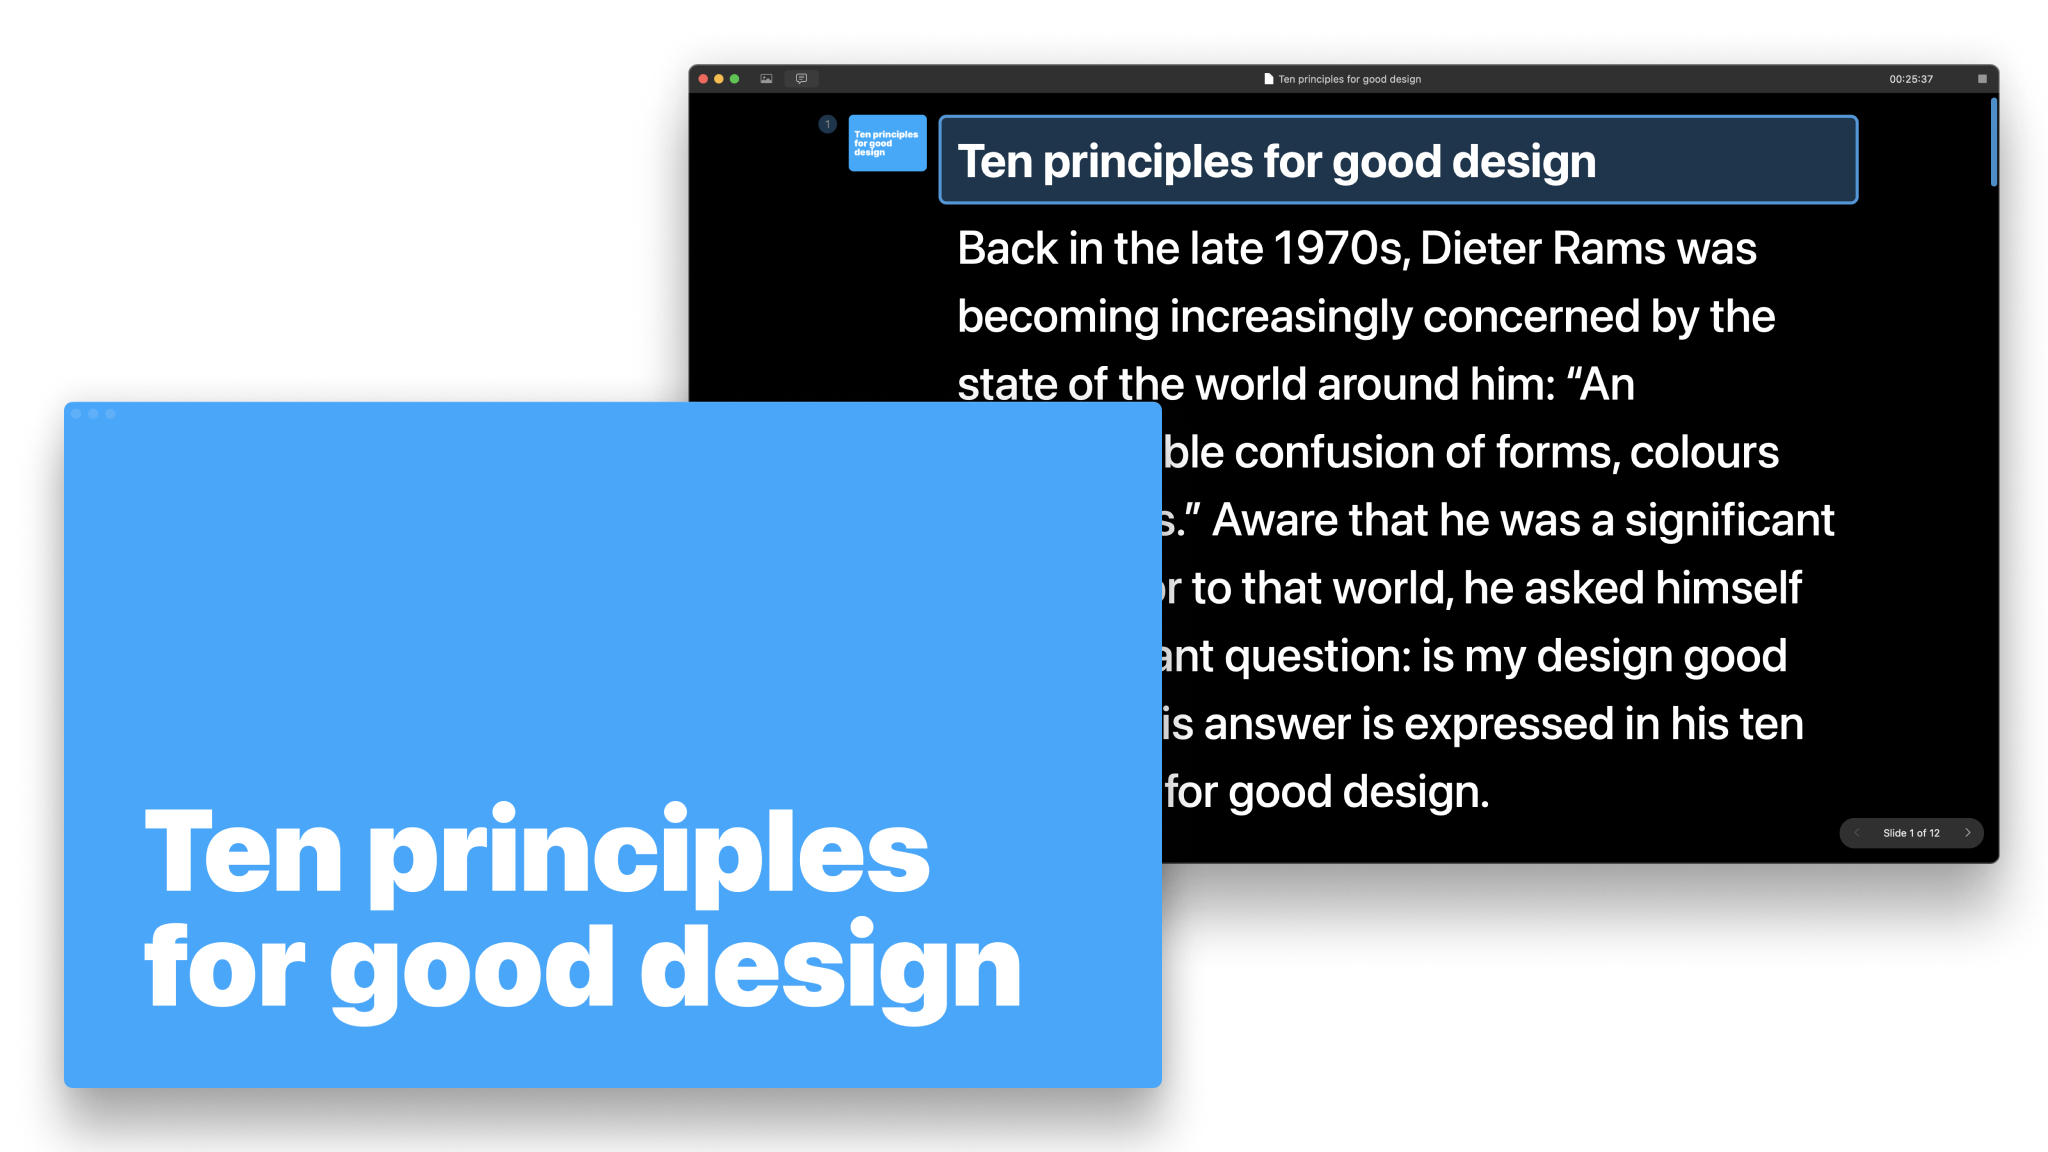
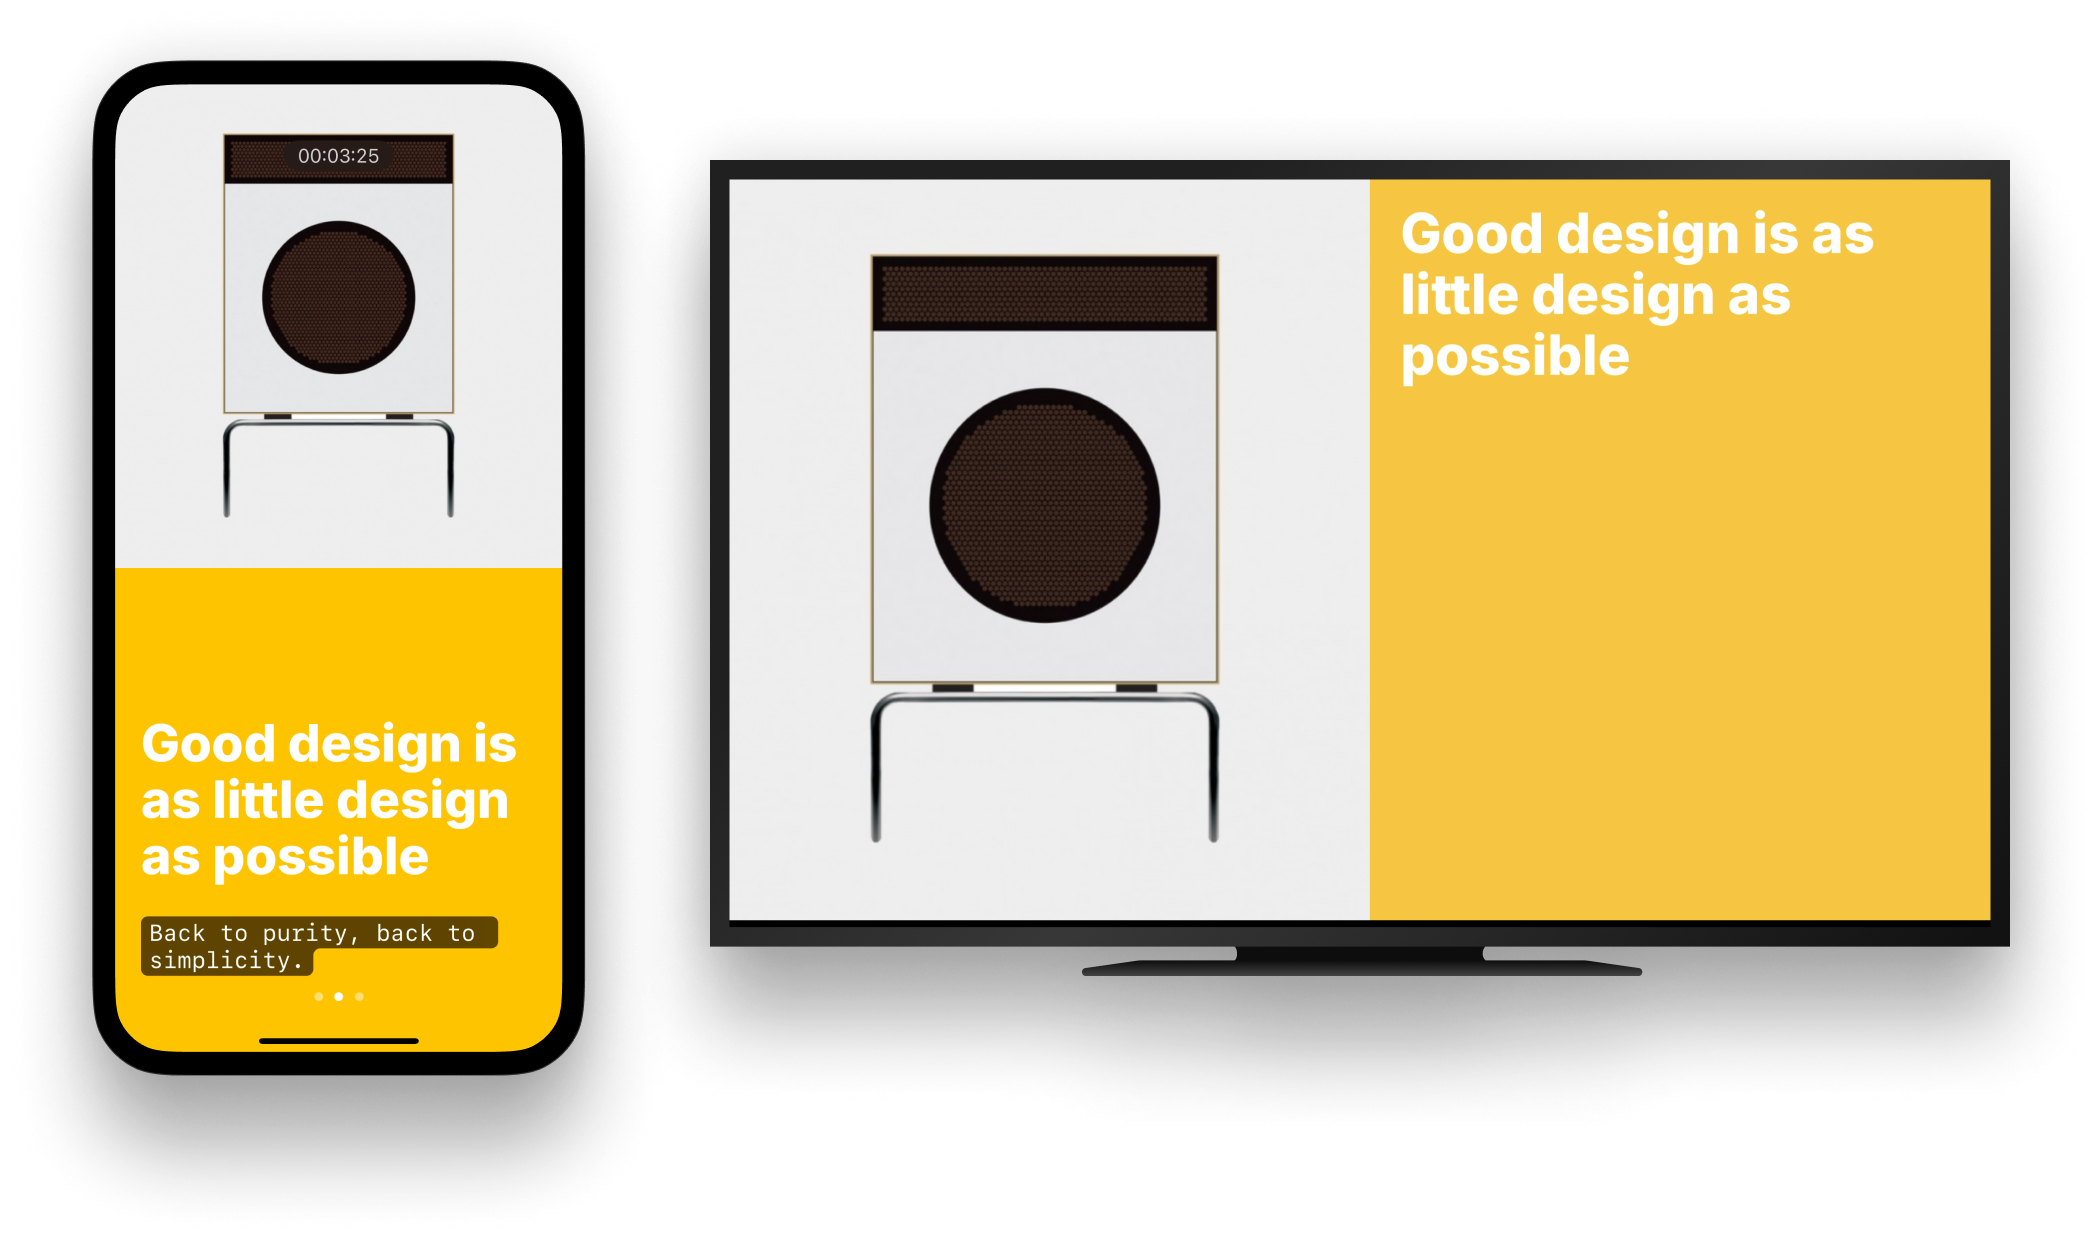
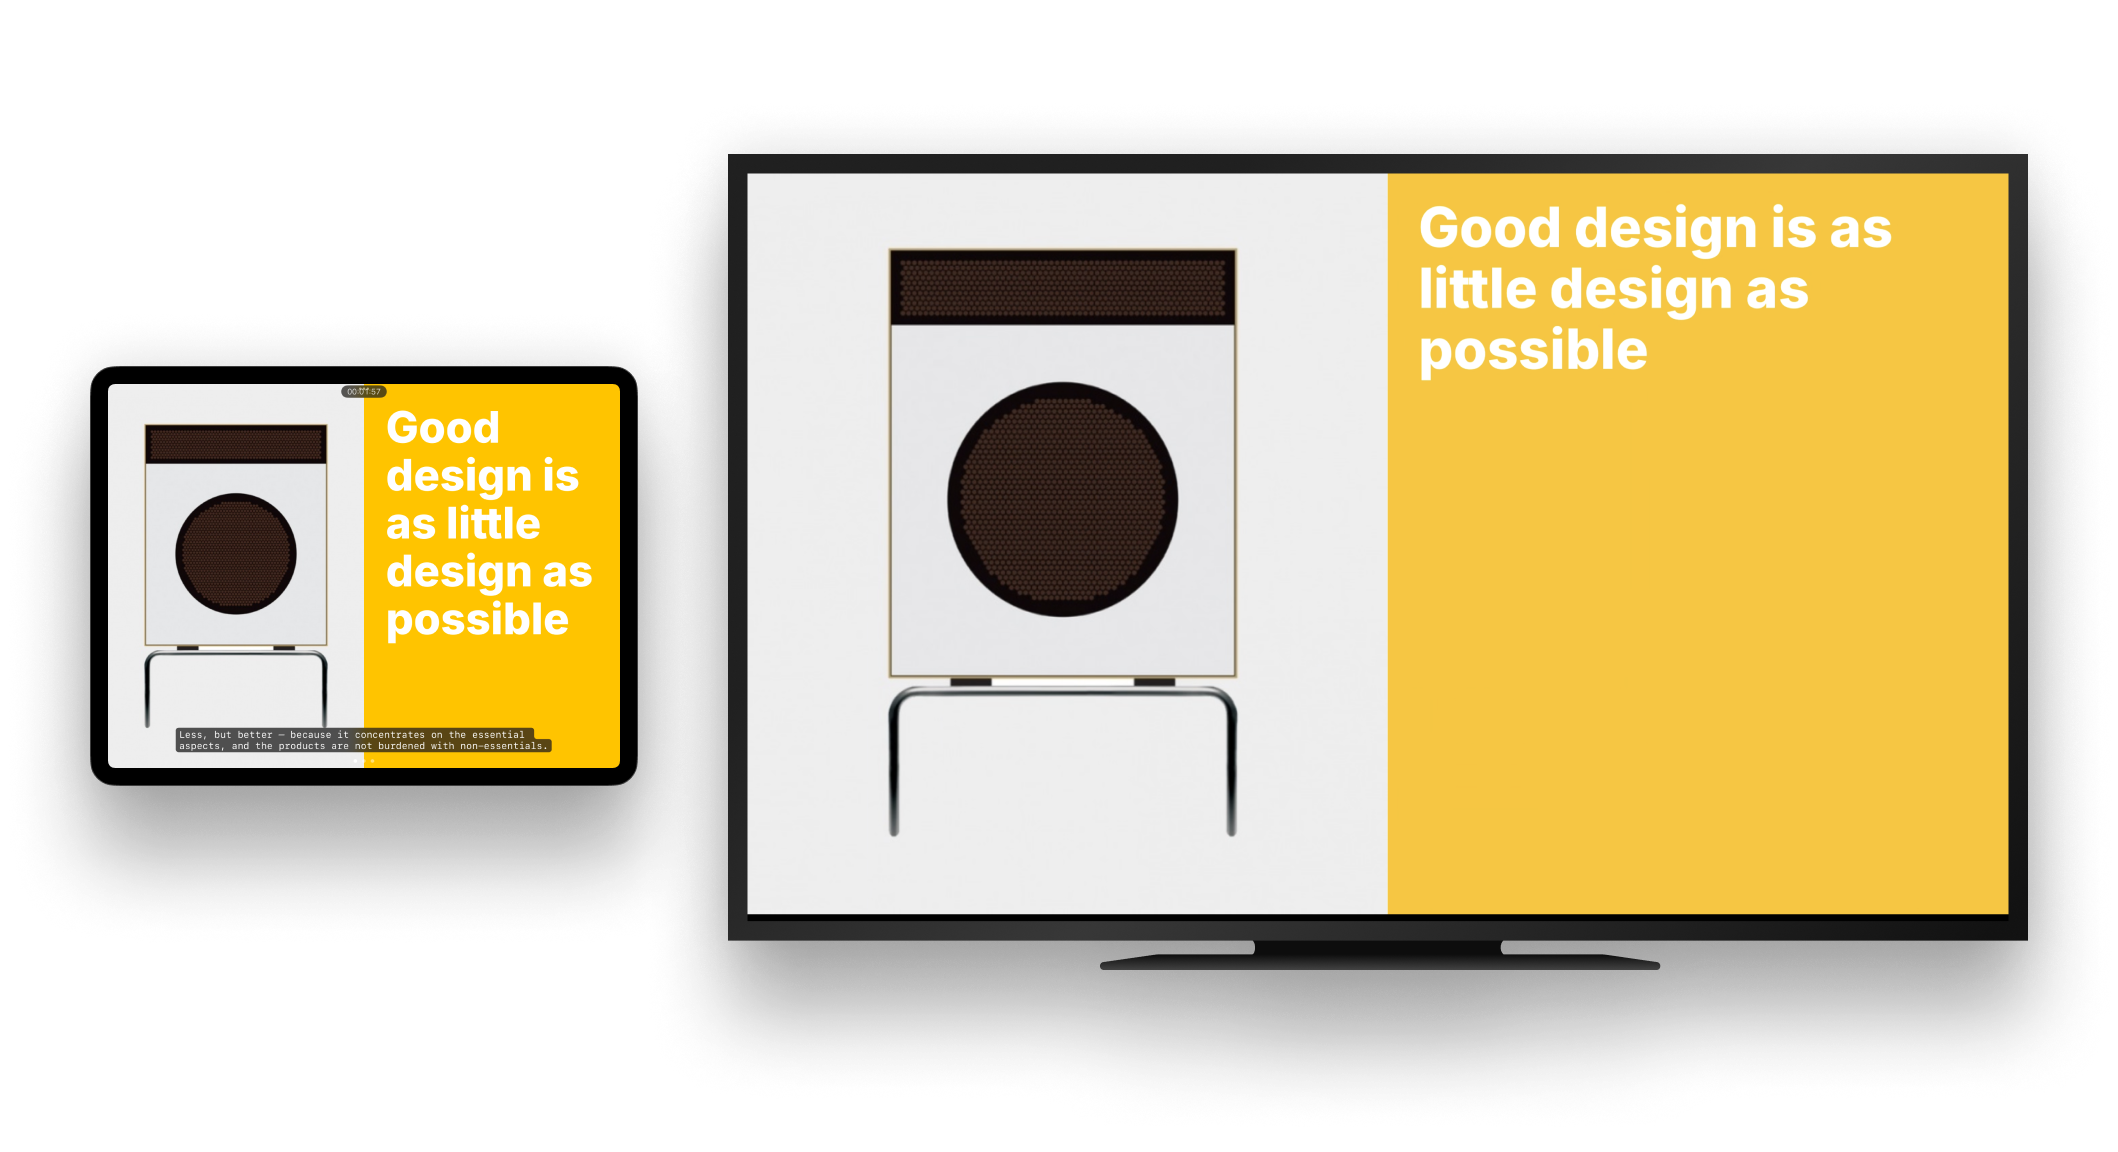
When using iA Presenter, make sure you choose Extended Mode. This way, your Mac acts as a teleprompter by displaying speaker notes, while the secondary device (such as a projector or smart TV) will show the slides that only the audience will see.
Wired Connections
Adapter and Cables
Most projectors require that you physically connect them to your Mac, usually via a VGA or HDMI cable (more options listed here).
Few Macs have a built-in HDMI port. Most of them don’t. Modern laptops no longer come with a VGA port.

If the equipment at the venue is outdated, you may find yourself relying solely on a VGA cable—so it’s probably a good idea to bring along your own HDMI/VGA Mac adapter. First test it home.
After connecting your Mac to the projector, it should automatically detect the presence of the projector and transmit both audio and video.
Connection Issues
Order Matters
To help your Mac detect any external peripherals, try to follow this sequence:
- Shut down your Mac and the projector
- Connect the video cable
- Once connected, switch on the projector and allow it to boot up
- Set the projector’s input mode to search for computer data (check the projector’s documentation if needed)
- Start your Mac
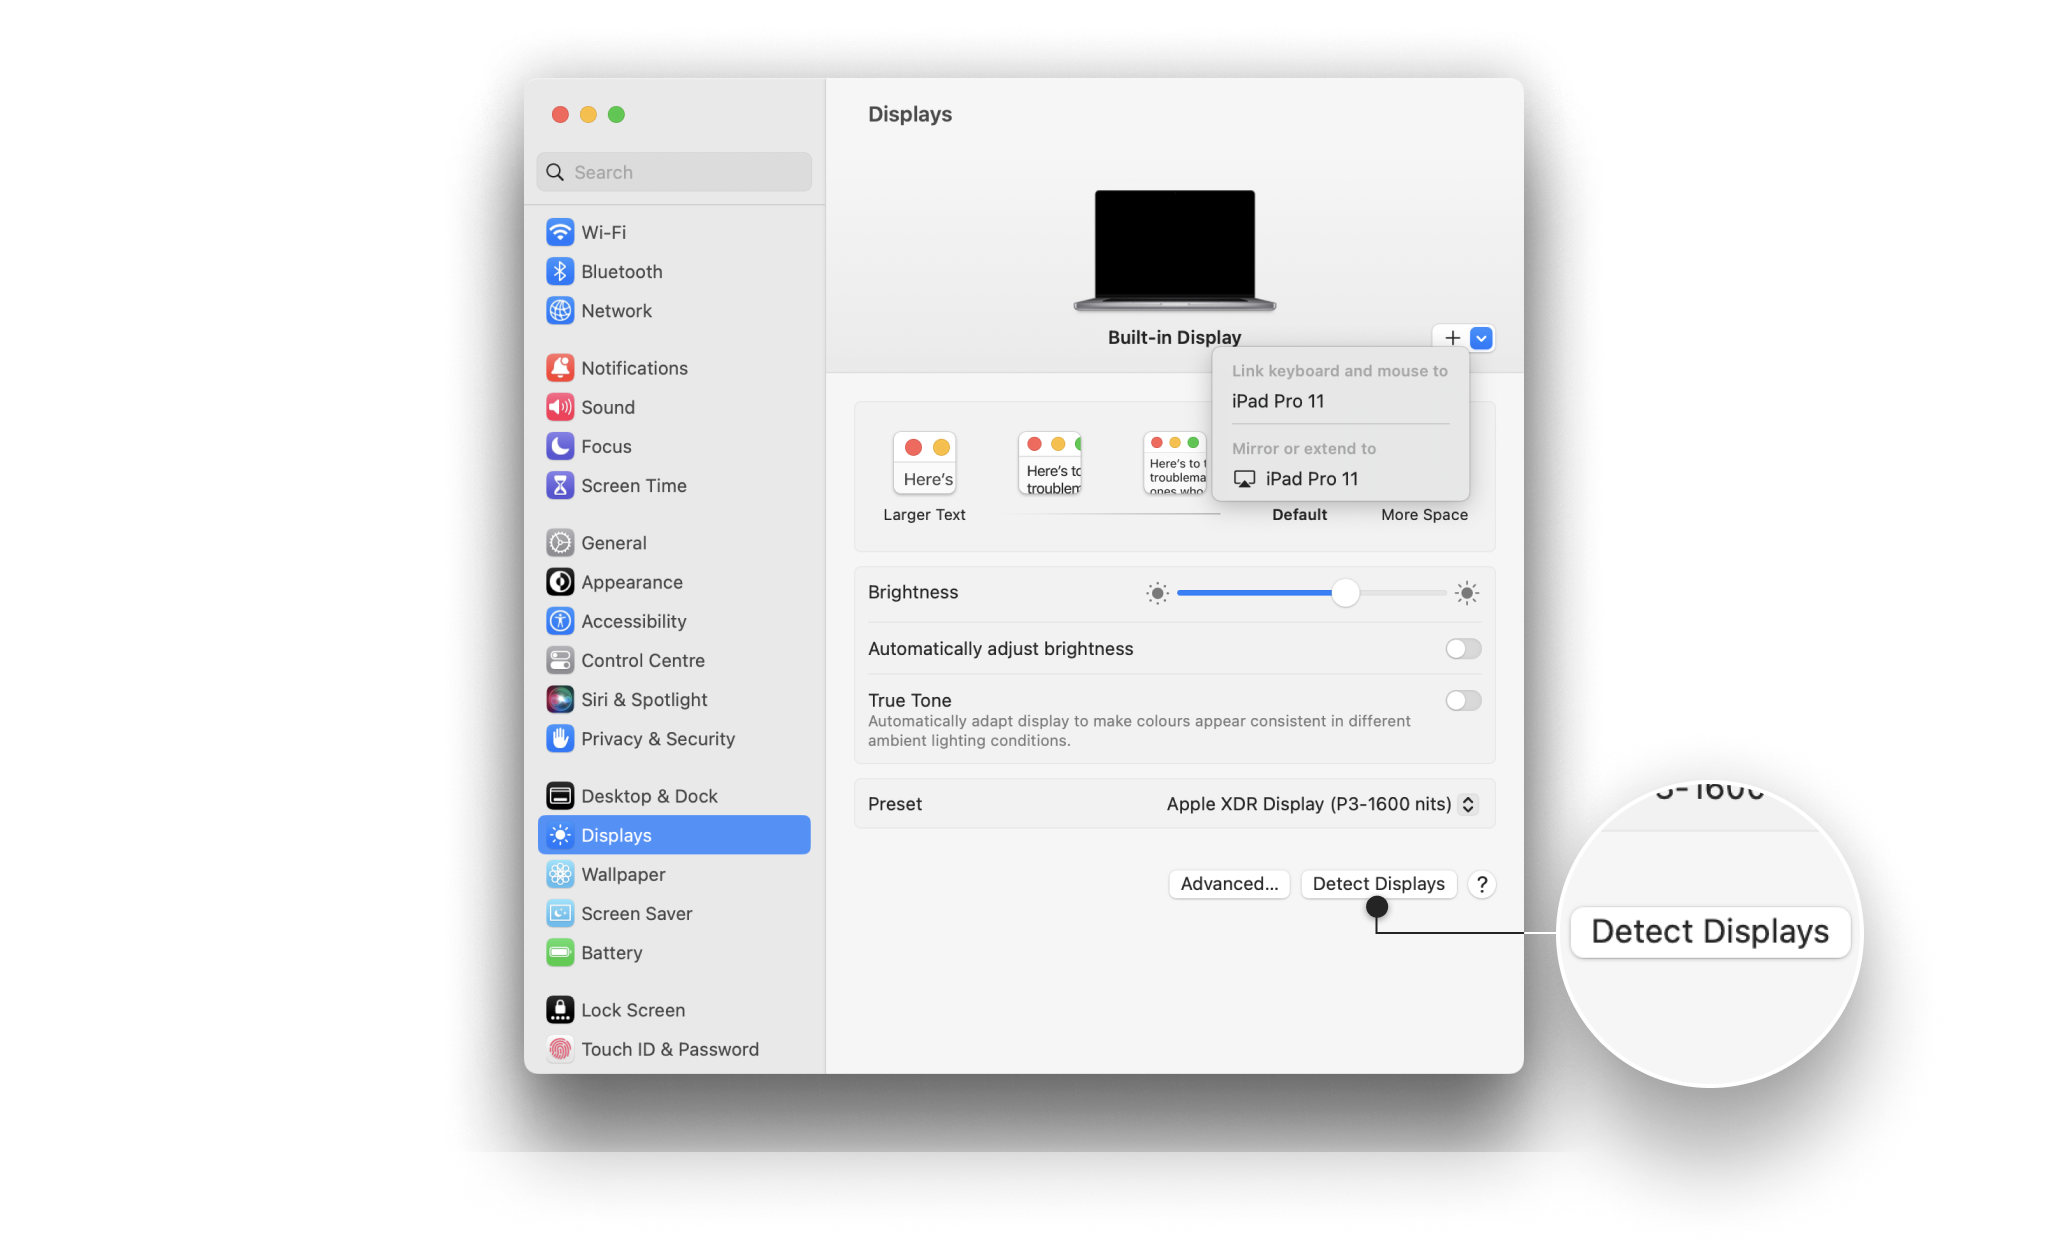
Detecting Displays
If you need to modify what’s shown on the display, change the resolution. Or, if your Mac doesn’t recognize the projector, open the Display Settings
of your Mac via → System Settings → Displays.
You can also force your Mac to scan for all connected displays. Press and hold the Option key to make the button Detect Displays appear in place of the Night Shift button.
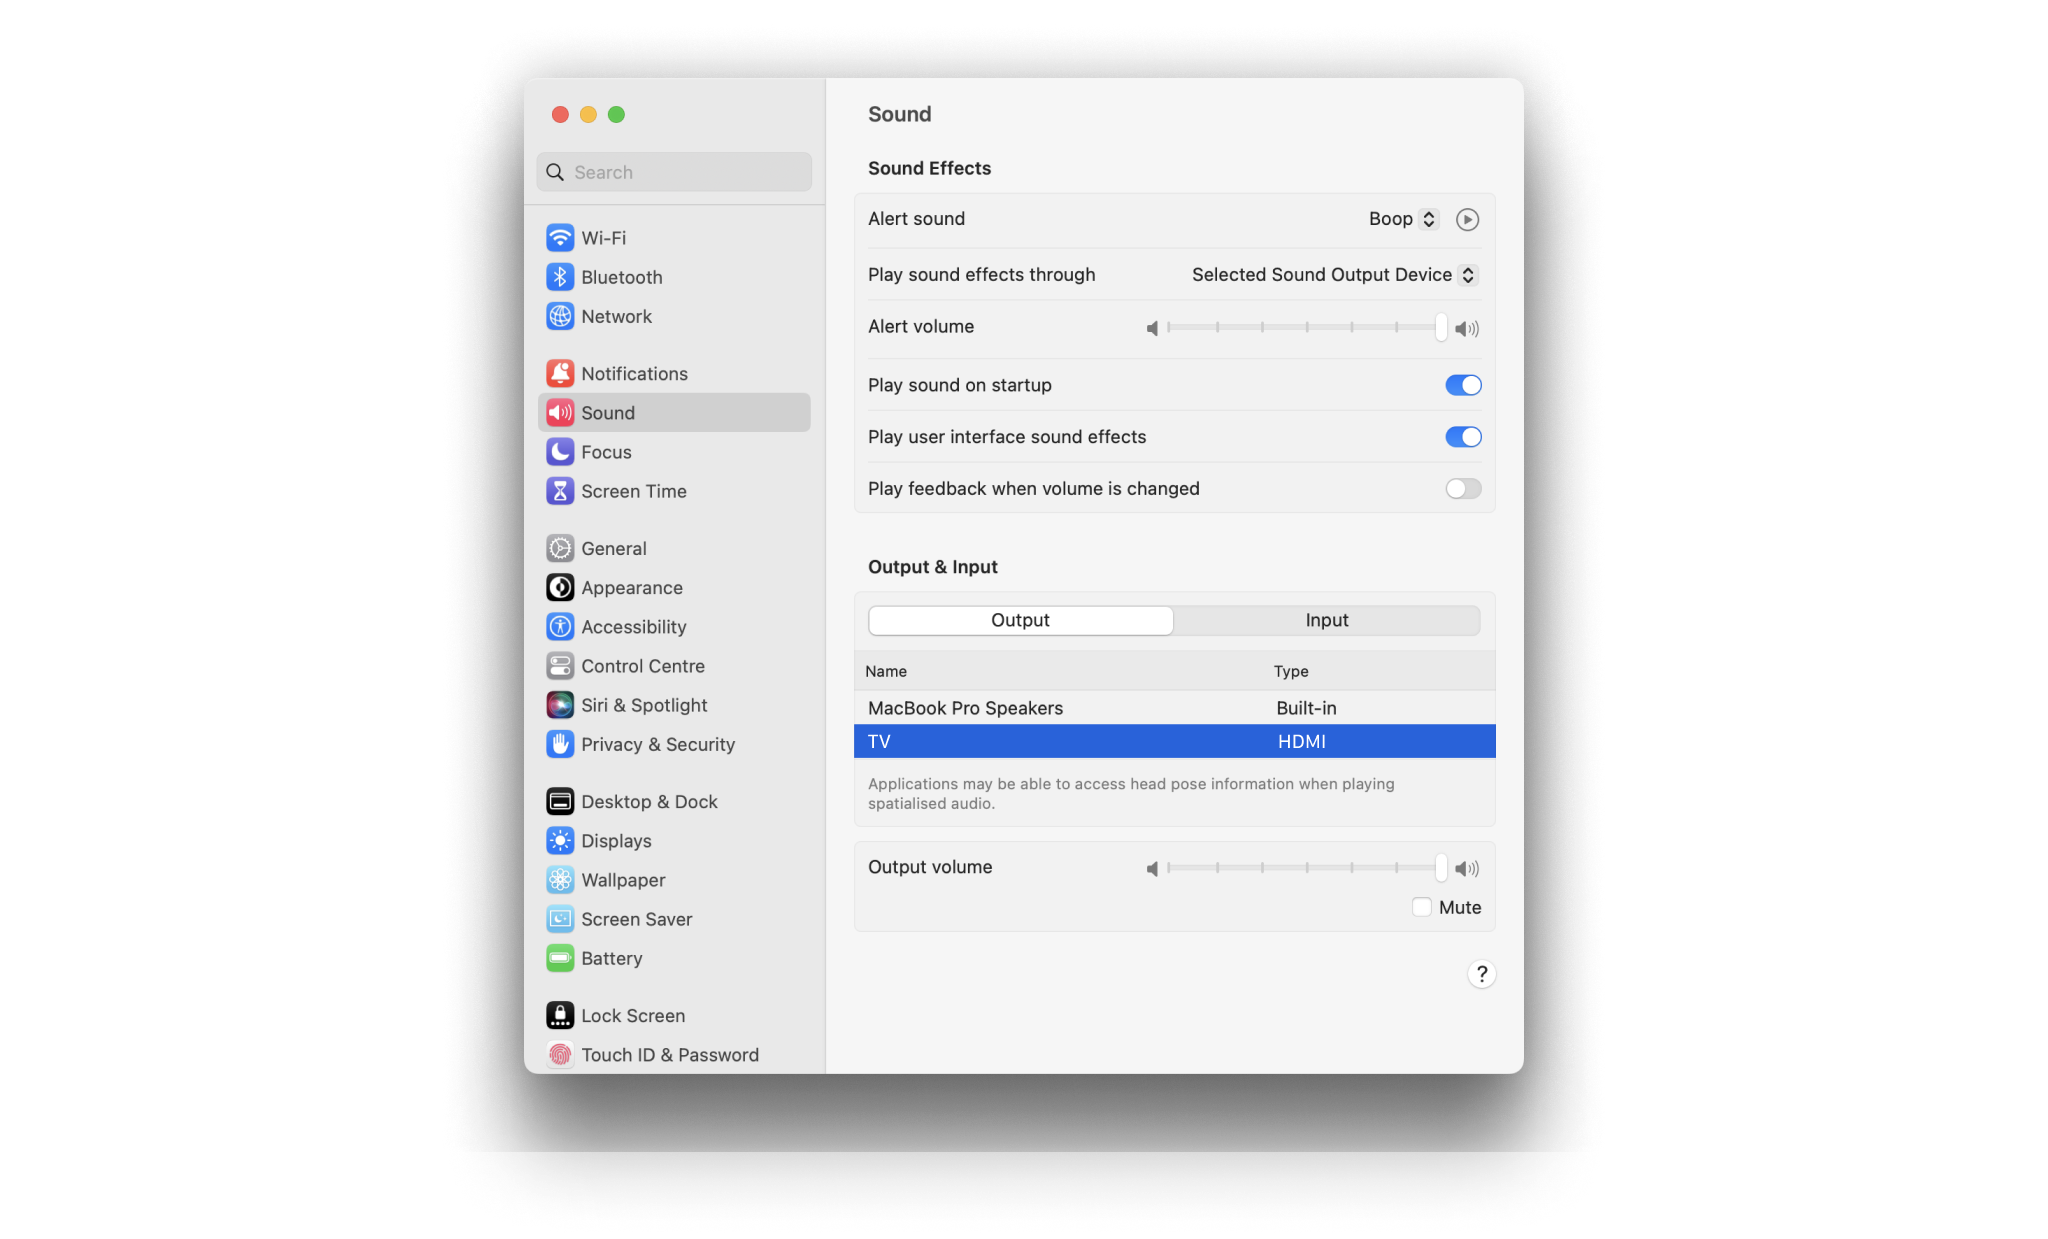
Audio Issues
The audio signal should be sent directly from your HDMI cable. As a first step, turn up the volume on the projector. If you’re not getting any sound coming from the projector, check the audio settings on your computer. Go to → System Settings → Sound → Output and select the proper device for sound output.
Troubleshooting Apple hardware or operating system (macOS) issues falls outside our support scope, but you can learn more on the Apple Support Site:
For troubleshooting third-party party hardware, please refer to the projector or external display’s documentation.
Wireless Connection
Many venues are now equipped with smart TVs that let you connect your laptop to a display without cables. On Mac, you can stream content to an external display with AirPlay through a Wi-Fi connection.
Smart TV Compatibility
If you aren’t sure whether the TV at the venue is a smart TV or not, here are some indicators. Smart TVs:
- Have an Ethernet port
- Are connected to the internet and let you use online features (like browsing an App Store)
- Usually have streaming apps embedded such as YouTube, Hulu, Netflix, or Amazon Prime
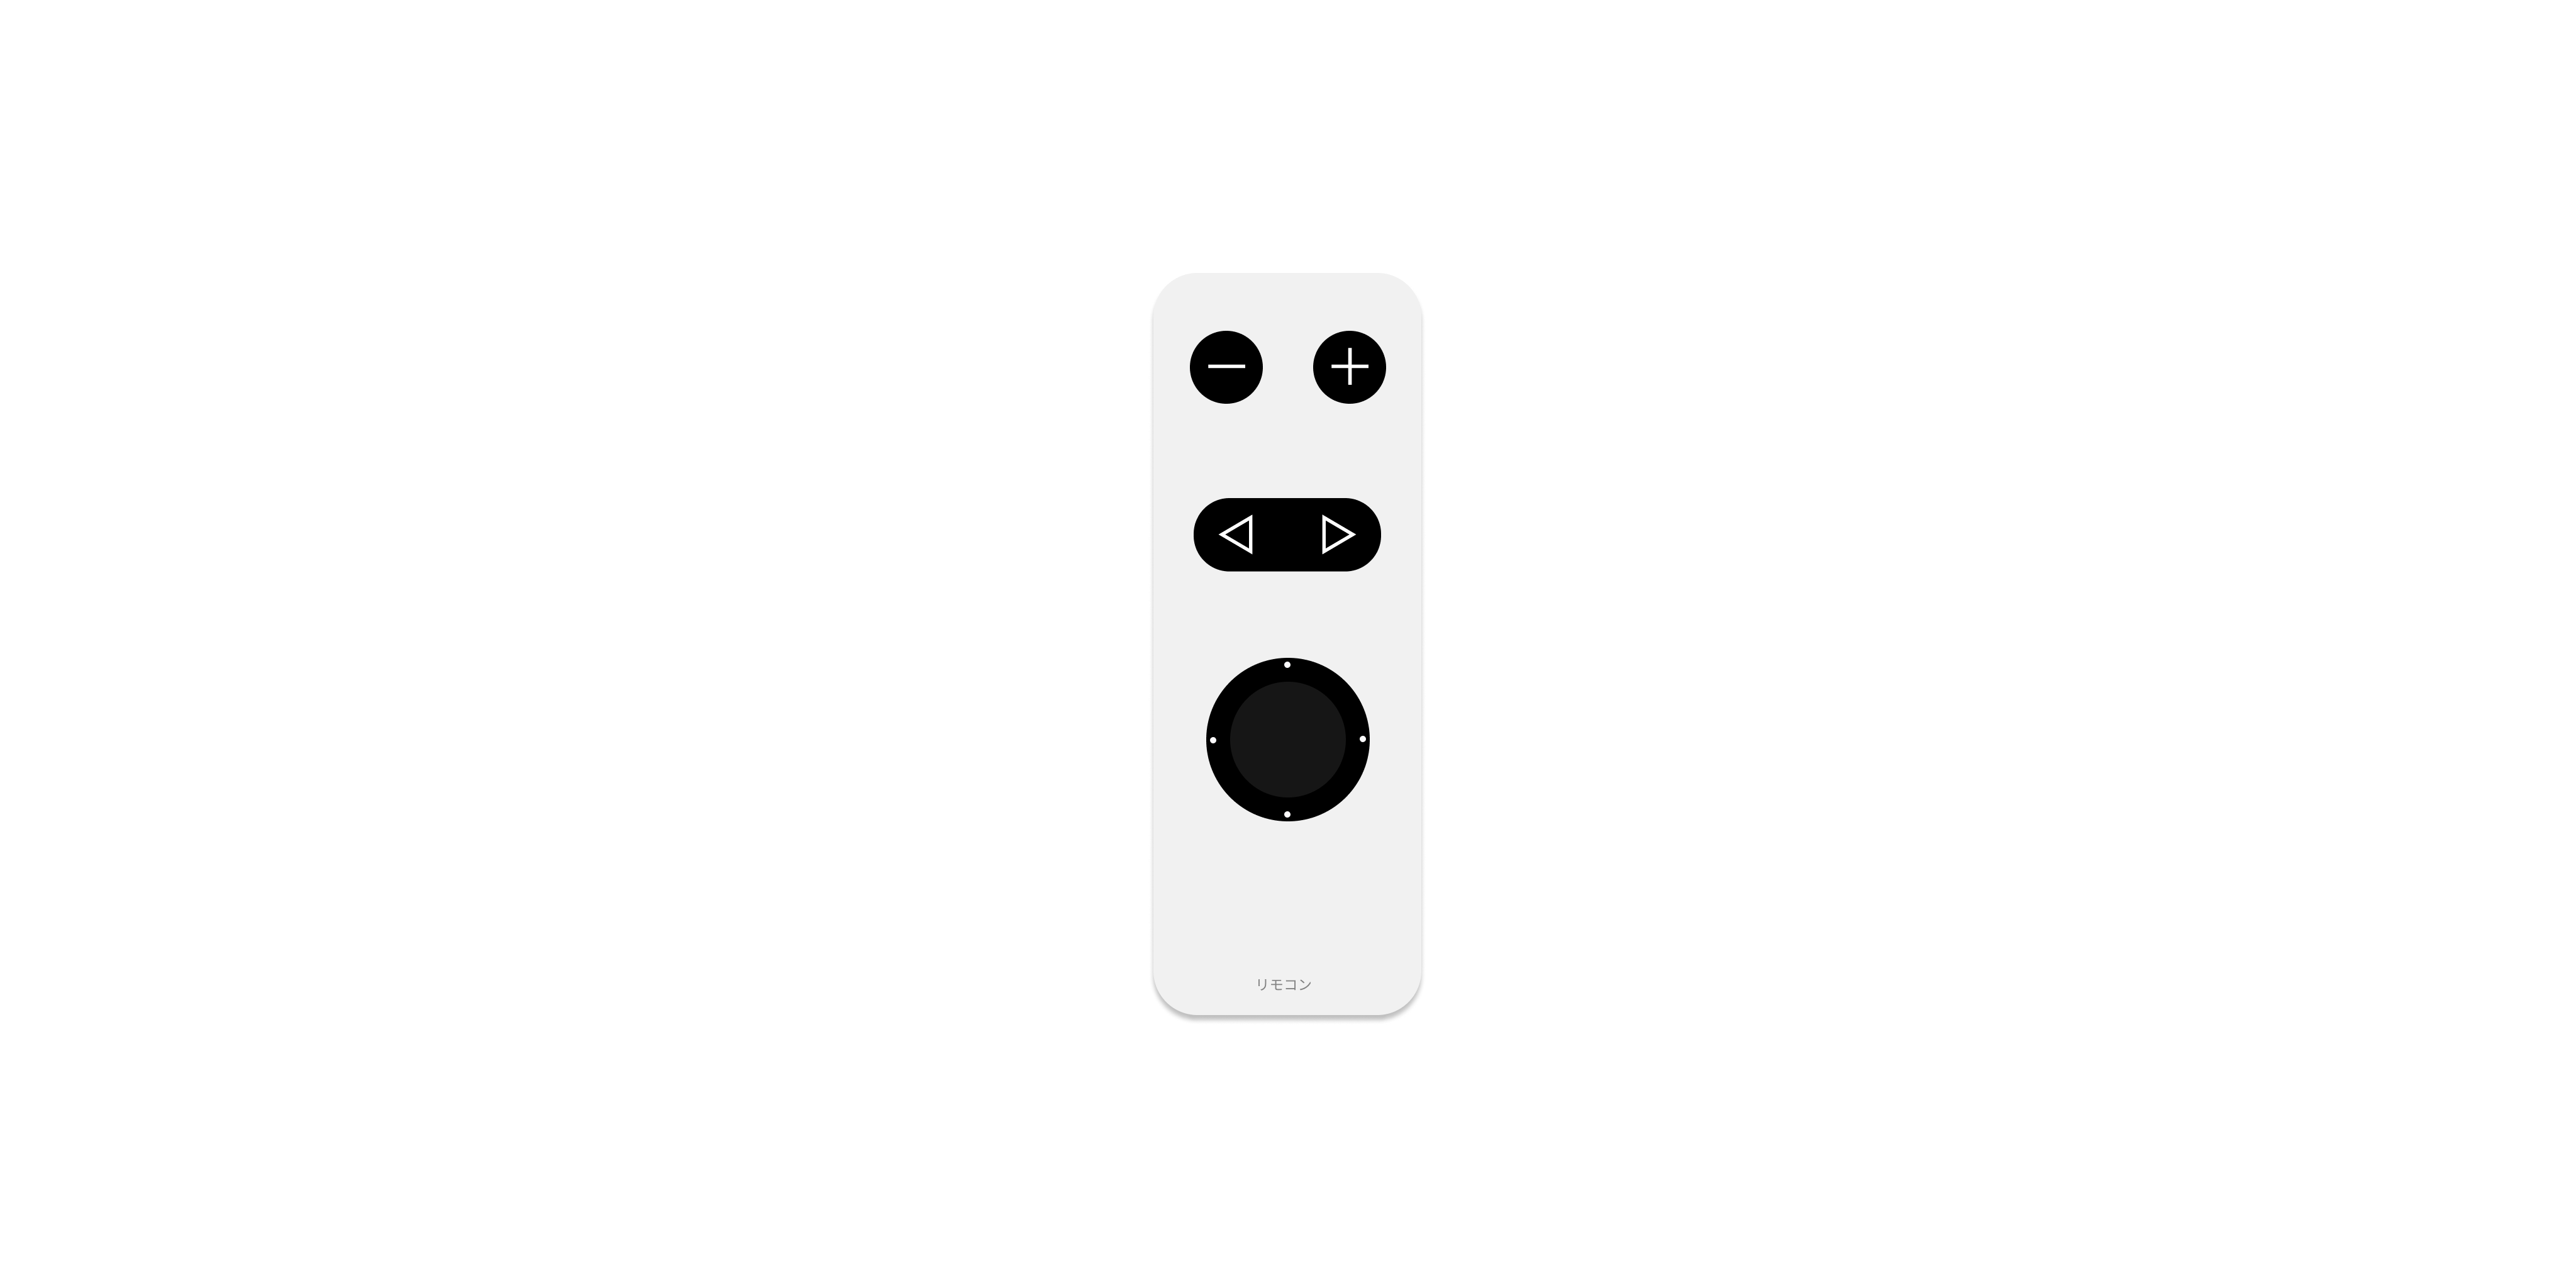
- Often have more buttons on their remote controllers, such as Netflix and YouTube
If most of these features are missing on the TV at the venue, then it probably isn’t a smart TV. That also means you’ll need to connect your Mac with a cable instead (find out how above).
Most smart TVs (Samsung, LG, Sony etc.) are compatible with Apple AirPlay, but in some cases that may not be an option. Try to verify AirPlay compatibility on the TV’s general settings. You can also find a list of compatible devices on the Apple Support Site: AirPlay-Enabled TVs and Video Accessories.
Apple TV
Venues may also make use of an AppleTV connected to an external source like a projector, external display or non-smart TV. In this case, you can connect to the Apple TV via AirPlay.
Your Mac and the smart TV/Apple TV unit need to be on the same Wi-Fi Network for AirPlay to work. Some venues will have different networks available, so be sure to check which one you should connect to.
💡 If the smart TV is not an Apple TV, you might need to turn on AirPlay in the TV’s settings.
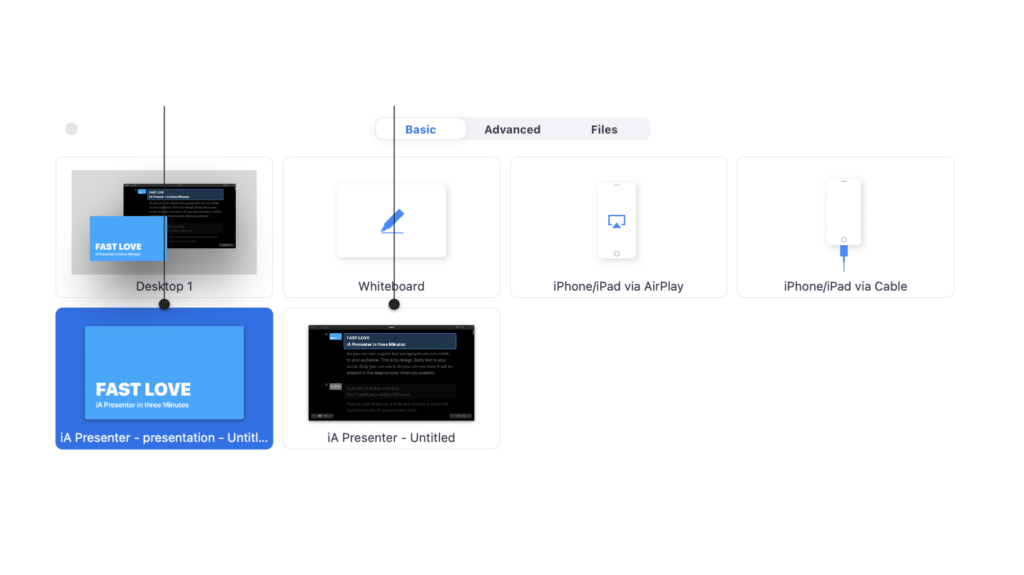
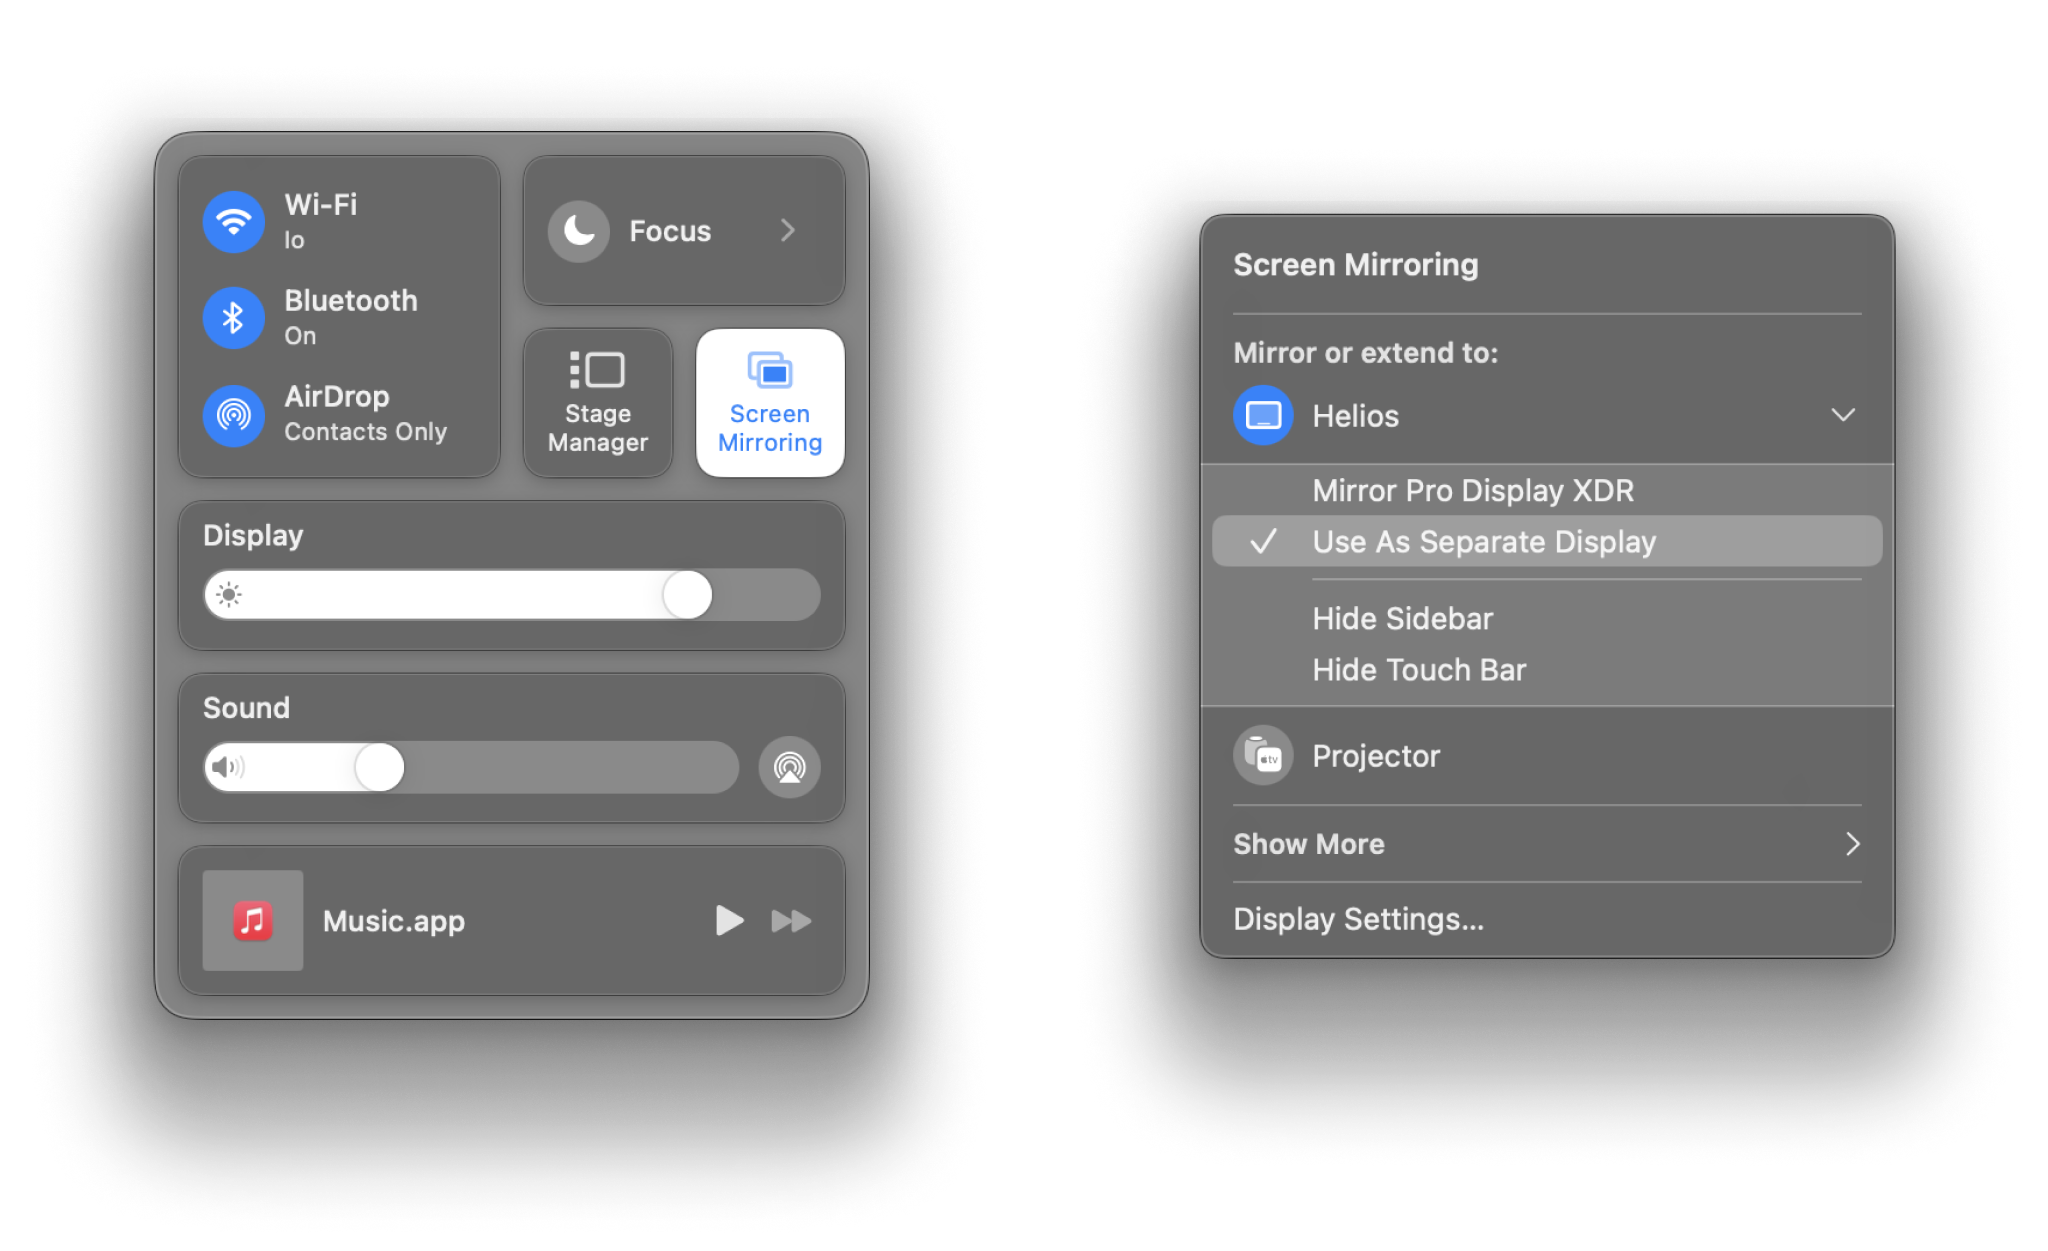
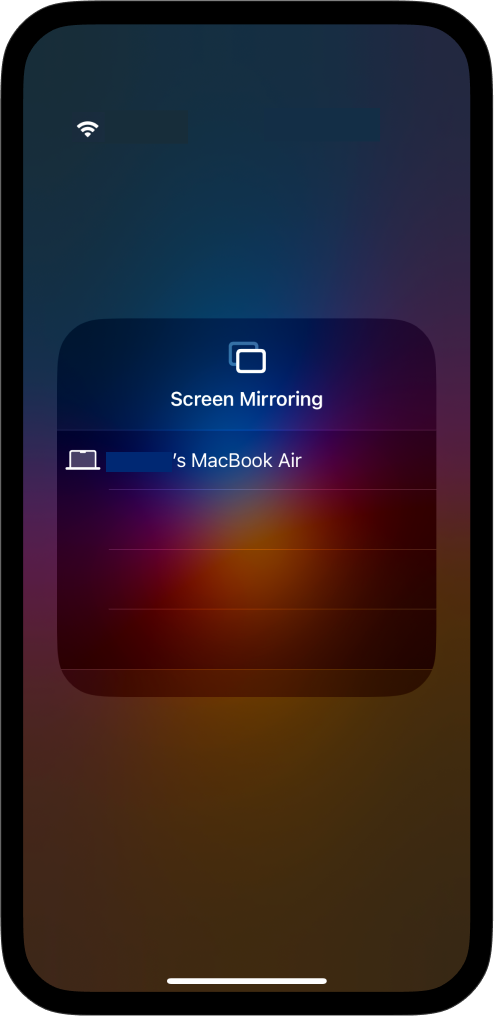
On your Mac, go to Control Center → Screen Mirroring, select your external display and choose Use as Separate Display. This will let you choose what you show to your audience (the slides, in your case) instead of mirroring your Mac. You might be asked to enter a four-digit code on your Mac. More about that on the Apple Support Site: Use AirPlay.
Some third-party tools allow you to mirror your Mac wirelessly instead of using AirPlay. Please refer to those apps’ documentation in case you run into issues.
If you’re going to present on a setup that belongs to the host, be sure to find out in advance what software and hardware options are available at the venue. If you’re not sure, you should probably bring your own device along.
Your iPhone screen will initially be projected in portrait mode. When you launch Presentation Mode in Presenter, the slides will switch to landscape mode (without showing the Spoken Notes).
Wired Connections
Adapters and Cables
Many projectors require that you physically connect them to your device, usually via a VGA, USB or HDMI cable.
Bring along an adapter that’s compatible with your iPhone (more about that on the Apple Support Site). Test it at home before the big day.
Once you connect your iPhone to the projector, it should automatically detect the device and transmit both audio and video.
Connection Issues
Order Matters
To help your iPhone detect any external peripherals, try to follow this sequence:
- Shut down your iPhone and the projector
- Connect the video cable
- Once connected, switch on the projector and allow it to boot up
- Set the projector’s input mode to search for device data (check the projector’s documentation if needed)
- Switch on your iPhone
Audio Issues
The audio signal should be sent directly via your HDMI cable. As a first step, turn up the volume on the projector. If you’re not getting any sound coming from the projector, check the audio settings on your iPhone.
Troubleshooting Apple hardware or operating system (iOS) issues falls outside our support scope, but you can learn more on Apple’s Support site.
For troubleshooting third-party party hardware, please refer to the projector or external display’s documentation.
Wireless Connection
Many venues are now equipped with smart TVs that let you connect your device to a display without cables. On iOS, you can stream content to an external display with AirPlay through a Wi-Fi connection. Note that you need both your iPhone and the display to be on the same Wi-Fi Network for AirPlay to work.
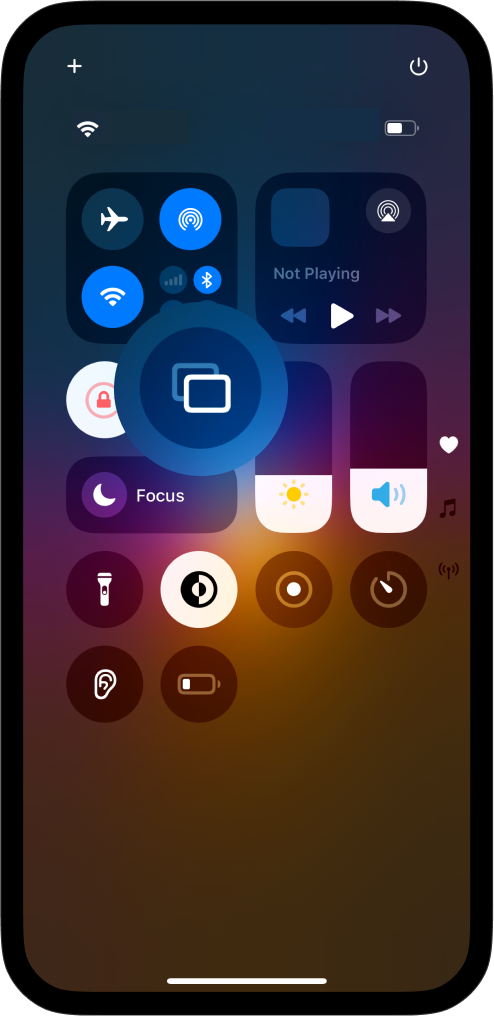
On your iPhone, go to Control Center → Screen Mirroring. More about that on Apple’s Support site: Use AirPlay.
💡 Some third-party tools allow you to mirror your iOS wirelessly instead of using AirPlay. Please refer to those apps’ documentation in case you run into issues.
Smart TV Compatibility
If you aren’t sure whether the TV at the venue is a smart TV or not, here are some indicators. Smart TVs:
- Have an Ethernet port
- Are connected to the Internet and let you use online features (like browsing an App Store)
- Usually have streaming apps embedded such as YouTube, Hulu, Netflix, or Amazon Prime
- Often have more buttons on their remote controllers, such as Netflix and YouTube
If most of these features are missing on the TV at the venue, then it probably isn’t a smart TV. That also means you’ll need to connect your iPhone with a cable instead (find out how above).
Most smart TVs (Samsung, LG, Sony etc.) are compatible with Apple AirPlay, but in some cases that may not be an option. Try to verify AirPlay compatibility on the TV’s general settings. You can also find a list of compatible devices on Apple’s Support site: AirPlay-enabled TVs and video accessories.
Apple TV
Venues may also make use of an AppleTV connected to an external source like a projector, external display or non-smart TV. In this case, you can connect to the Apple TV via AirPlay.
Both your iPhone and the smart TV/Apple TV unit need to be on the same Wi-Fi Network for AirPlay to work. Some venues will have different networks available, so be sure to check which one you should connect to.
💡 If the smart TV is not an Apple TV, you might need to turn on AirPlay in the TV’s settings.
If you’re going to present on a setup that belongs to the host, be sure to find out in advance what software and hardware options are available at the venue. If you’re not sure, you should probably bring your own device along.
Wired Connections
Adapters and Cables
Many projectors require that you physically connect them to your device, usually via a VGA, USB or HDMI cable.
Bring along an adapter that’s compatible with your iPad (more about that on Apple’s Support site). Test it at home before the big day.
Once you connect your iPad to the projector, it should automatically detect the device and transmit both audio and video.
Connection Issues
Order Matters
To help your iPad detect any external peripherals, try to follow this sequence:
- Shut down your iPad and the projector
- Connect the video cable
- Once connected, switch on the projector and allow it to boot up
- Set the projector’s input mode to search for device data (check the projector’s documentation if needed)
- Switch on your iPad
Audio Issues
The audio signal should be sent directly via your HDMI cable. As a first step, turn up the volume on the projector. If you’re not getting any sound from the projector, check the audio settings on your iPad.
Troubleshooting Apple hardware or operating system (iOS) issues falls outside our support scope, but you can learn more on Apple’s Support site.
For troubleshooting third-party party hardware, please refer to the projector or external display’s documentation.
Wireless Connection
Many venues are now equipped with smart TVs that let you connect your device to a display without cables. On iOS, you can stream content to an external display with AirPlay through a Wi-Fi connection. Note that you need both your iPad and the display to be on the same Wi-Fi Network for AirPlay to work.
On your iPad, go to Control Center → Screen Mirroring. More about that on Apple’s Support site: Use AirPlay.
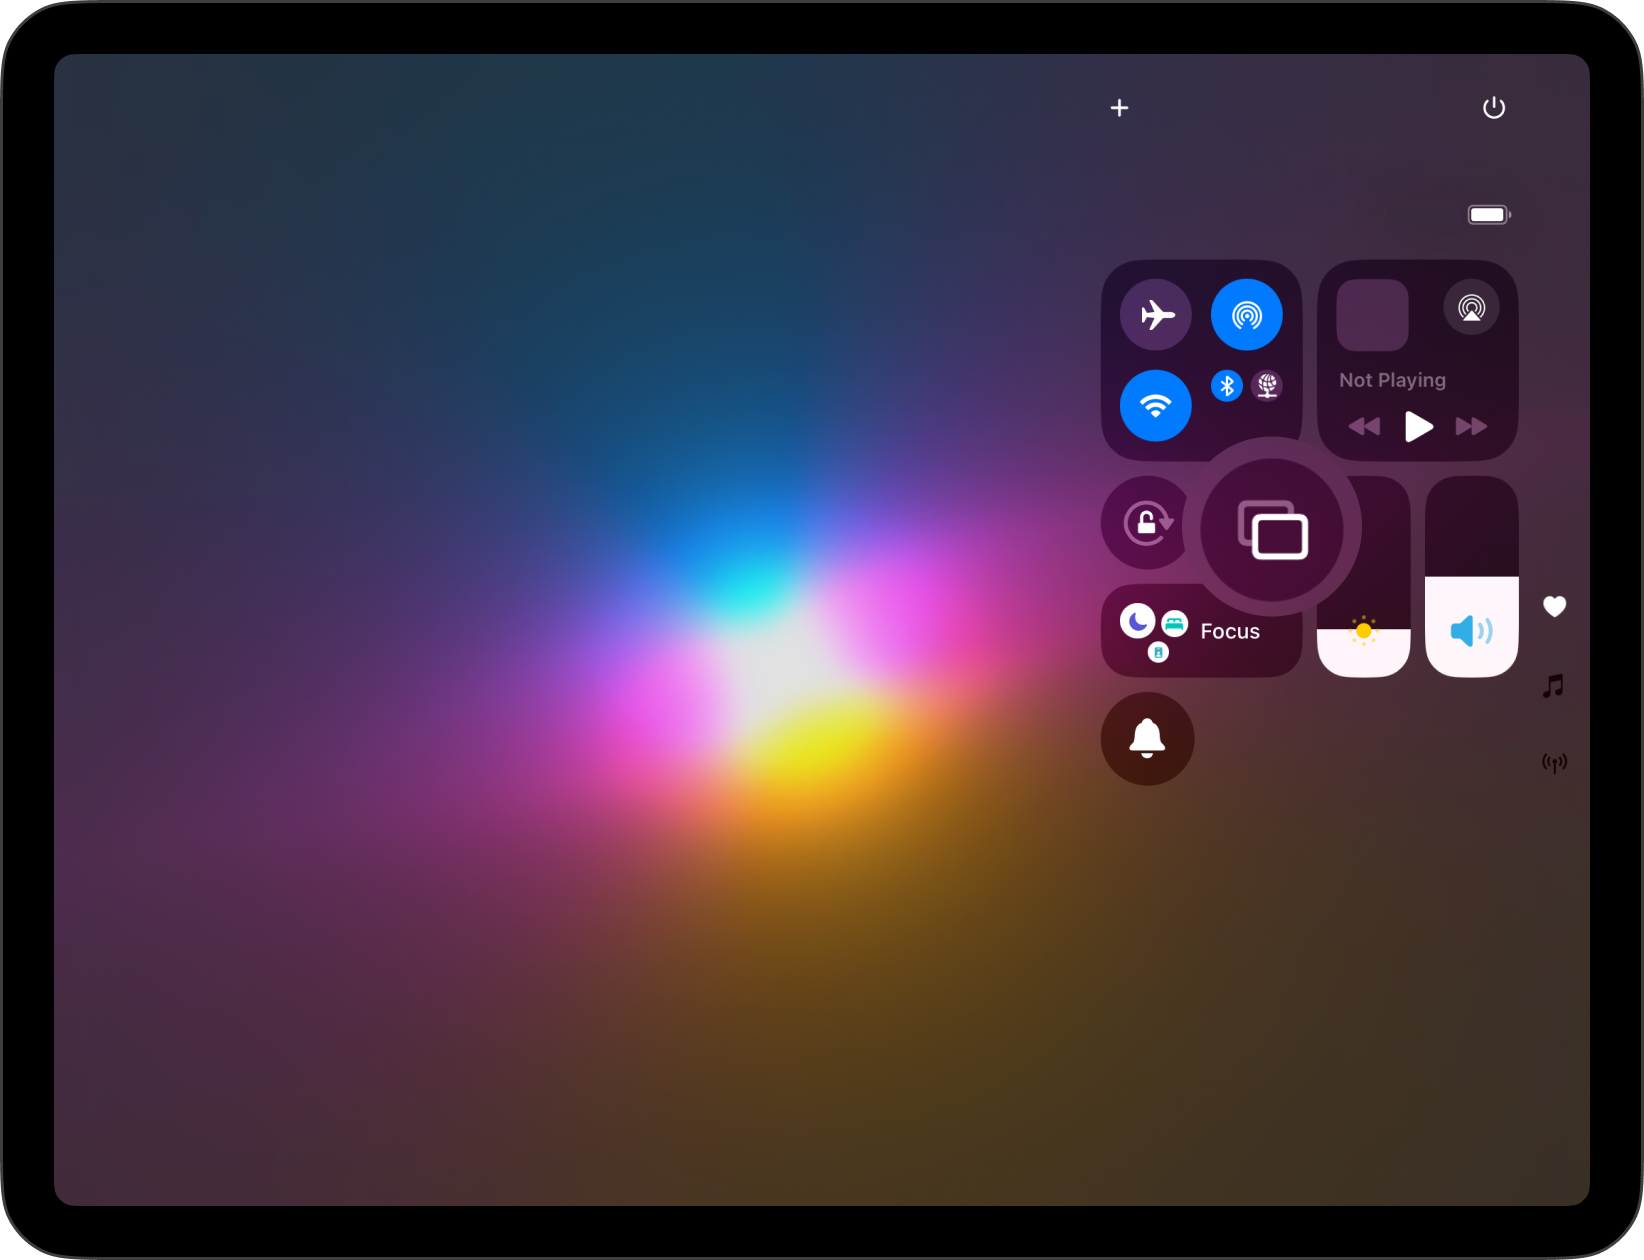
💡 Some third-party tools allow you to mirror your iOS wirelessly instead of using AirPlay. Please refer to those apps’ documentation in case you run into issues.
Smart TV Compatibility
If you aren’t sure whether the TV at the venue is a smart TV or not, here are some indicators. Smart TVs:
- Have an Ethernet port
- Are connected to the internet and let you use online features (like browsing an App Store)
- Usually have streaming apps embedded such as YouTube, Hulu, Netflix, or Amazon Prime
- Often have more buttons on their remote controllers, such as Netflix and YouTube
If most of these features are missing on the TV at the venue, then it probably isn’t a smart TV. That also means you’ll need to connect your iPad with a cable instead (find out how above).
Most smart TVs (Samsung, LG, Sony etc.) are compatible with Apple AirPlay, but in some cases that may not be an option. Try to verify AirPlay compatibility on the TV’s general settings. You can also find a list of compatible devices on Apple’s Support site: AirPlay-enabled TVs and video accessories.
Apple TV
Venues may also make use of an AppleTV connected to an external source like a projector, external display or non-smart TV. In this case, you can connect to the Apple TV via AirPlay.
Your iPad and the smart TV/Apple TV unit need to be on the same Wi-Fi Network for AirPlay to work. Some venues will have different networks available, so be sure to check which one you should connect to.
💡 If the smart TV is not an Apple TV, you might need to turn on AirPlay in the TV’s settings.