Settings iPad

iA Writer is a minimalist app with streamlined settings that create a focused experience.
While keeping to a minimum, there is still some flexibility to adjust certain features for an improved user experience.
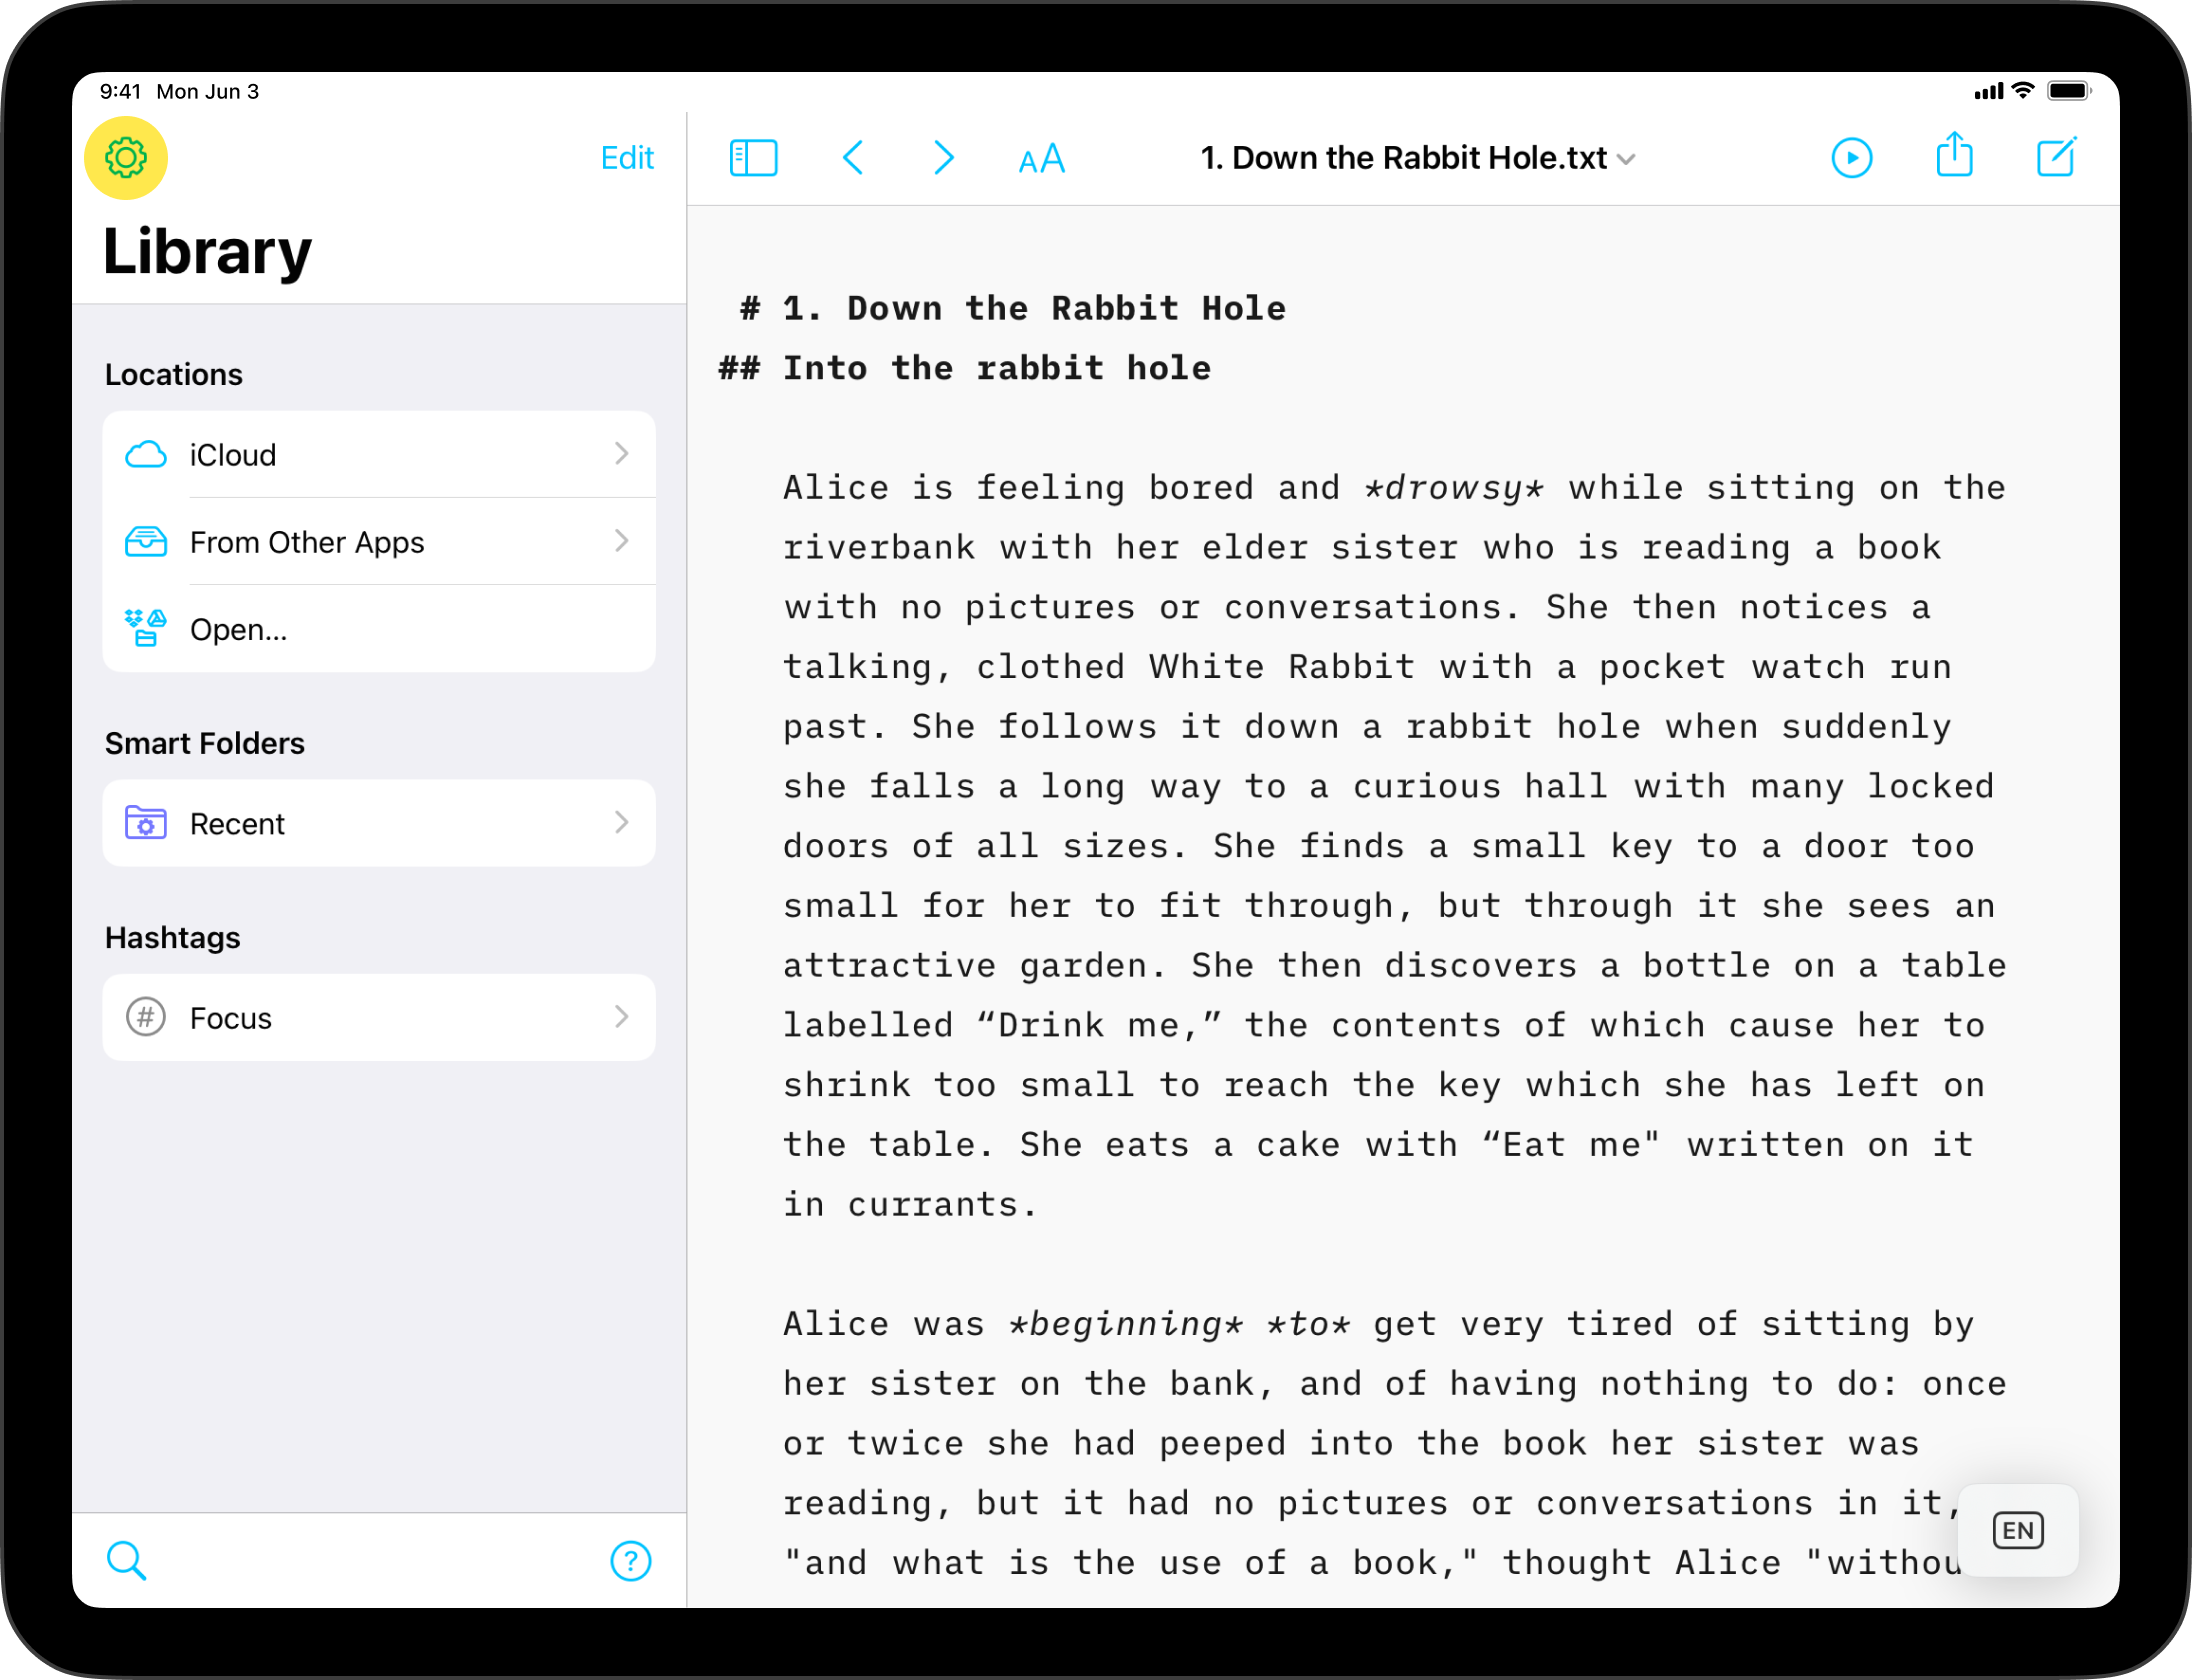
On iPad, tap the ⚙️ icon at the top-left of the Library to modify settings.
The Settings can be divided in the following categories:
Appearance
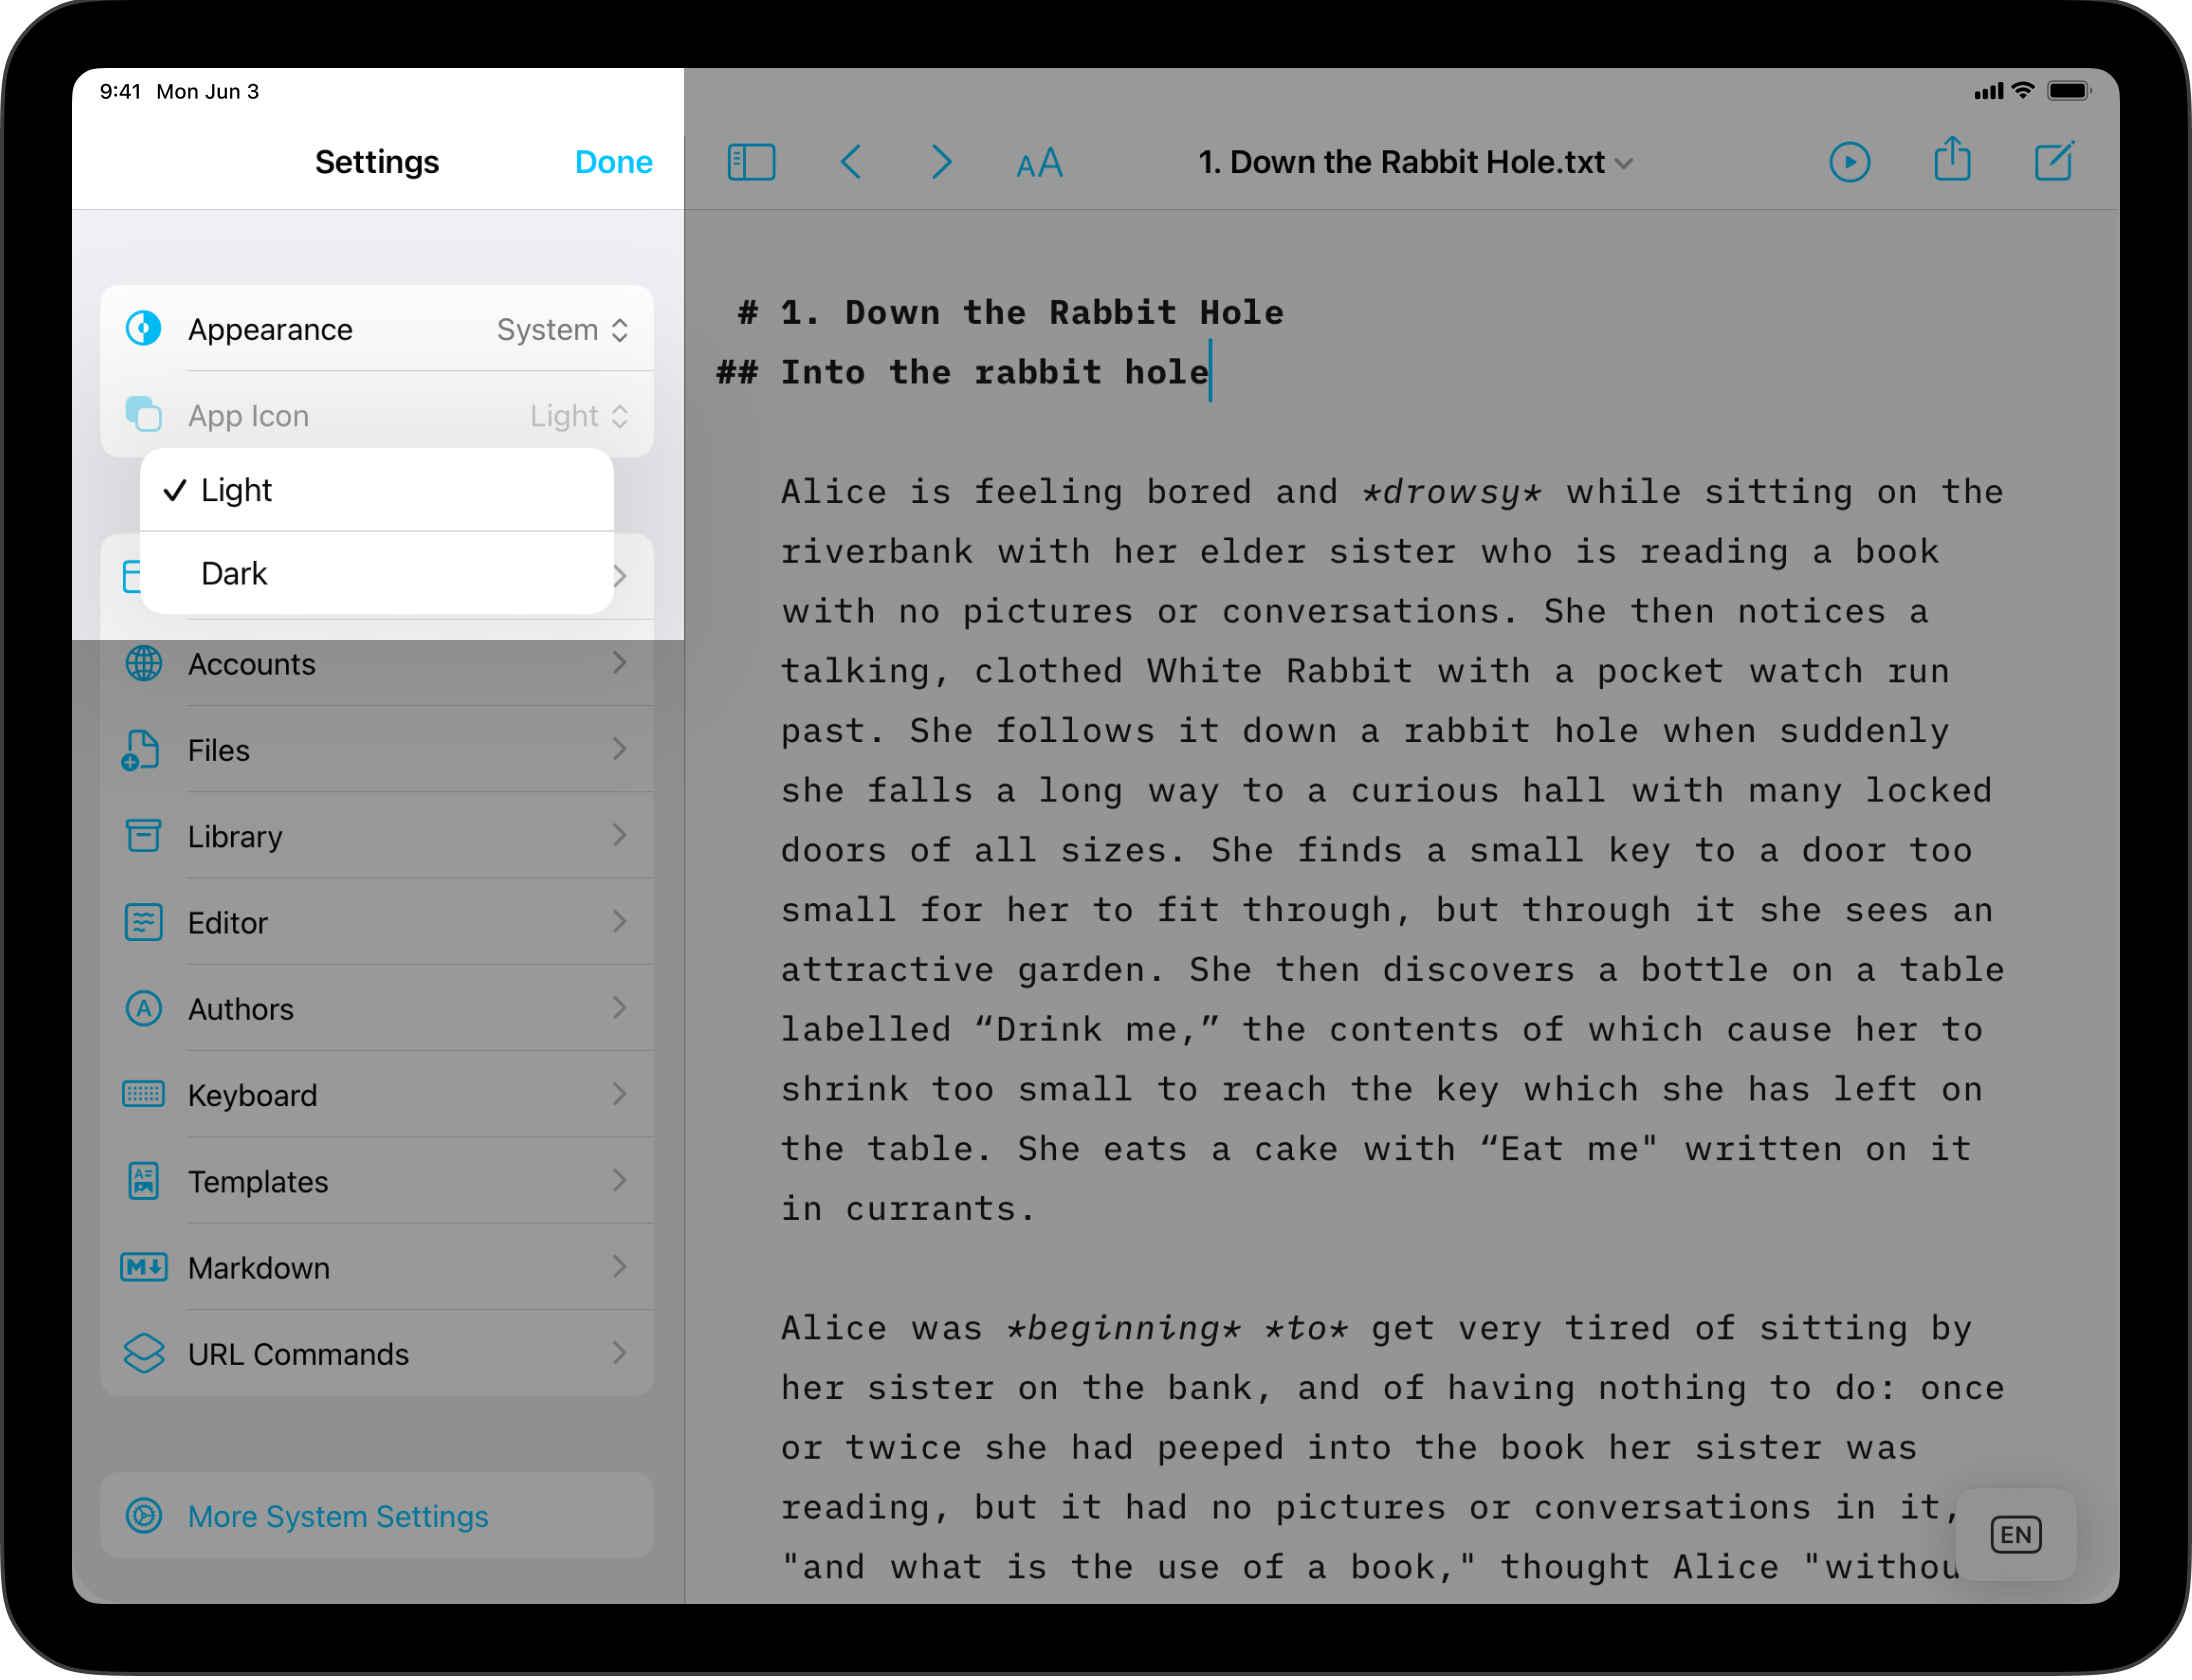
Appearance
You can switch the appearance of the app between Dark and Light modes. If you chose System, the app will follow iPadOS settings when changing between Light or Dark modes.
App Icon
You can switch the appearance of the app’s icon between Dark and Light modes.
Interface

Show File Extensions
Shows or hides file extensions (such as .txt or .md) in the Library file list.
Editor and Preview Settings
Scroll in Sync
When turned on, Preview will keep the same position as the text view in the Editor. It is useful when you are working in the middle of a document.
Toolbars
By default, iA Writer hides the toolbars above and below the Editor and Preview when scrolling. You can use this option to keep them always visible.
Accounts

Add new or configure existing accounts for:
- Ghost
- Medium
- Micro.blog
- Micropub
- WordPress
You can learn more about the possibilities of blogging with Writer here: Blog.
Files

Set your default plain text file extension. Common extensions are:
.txtor.textfor text.mdfor Markdown.fountainfor the Fountain Template
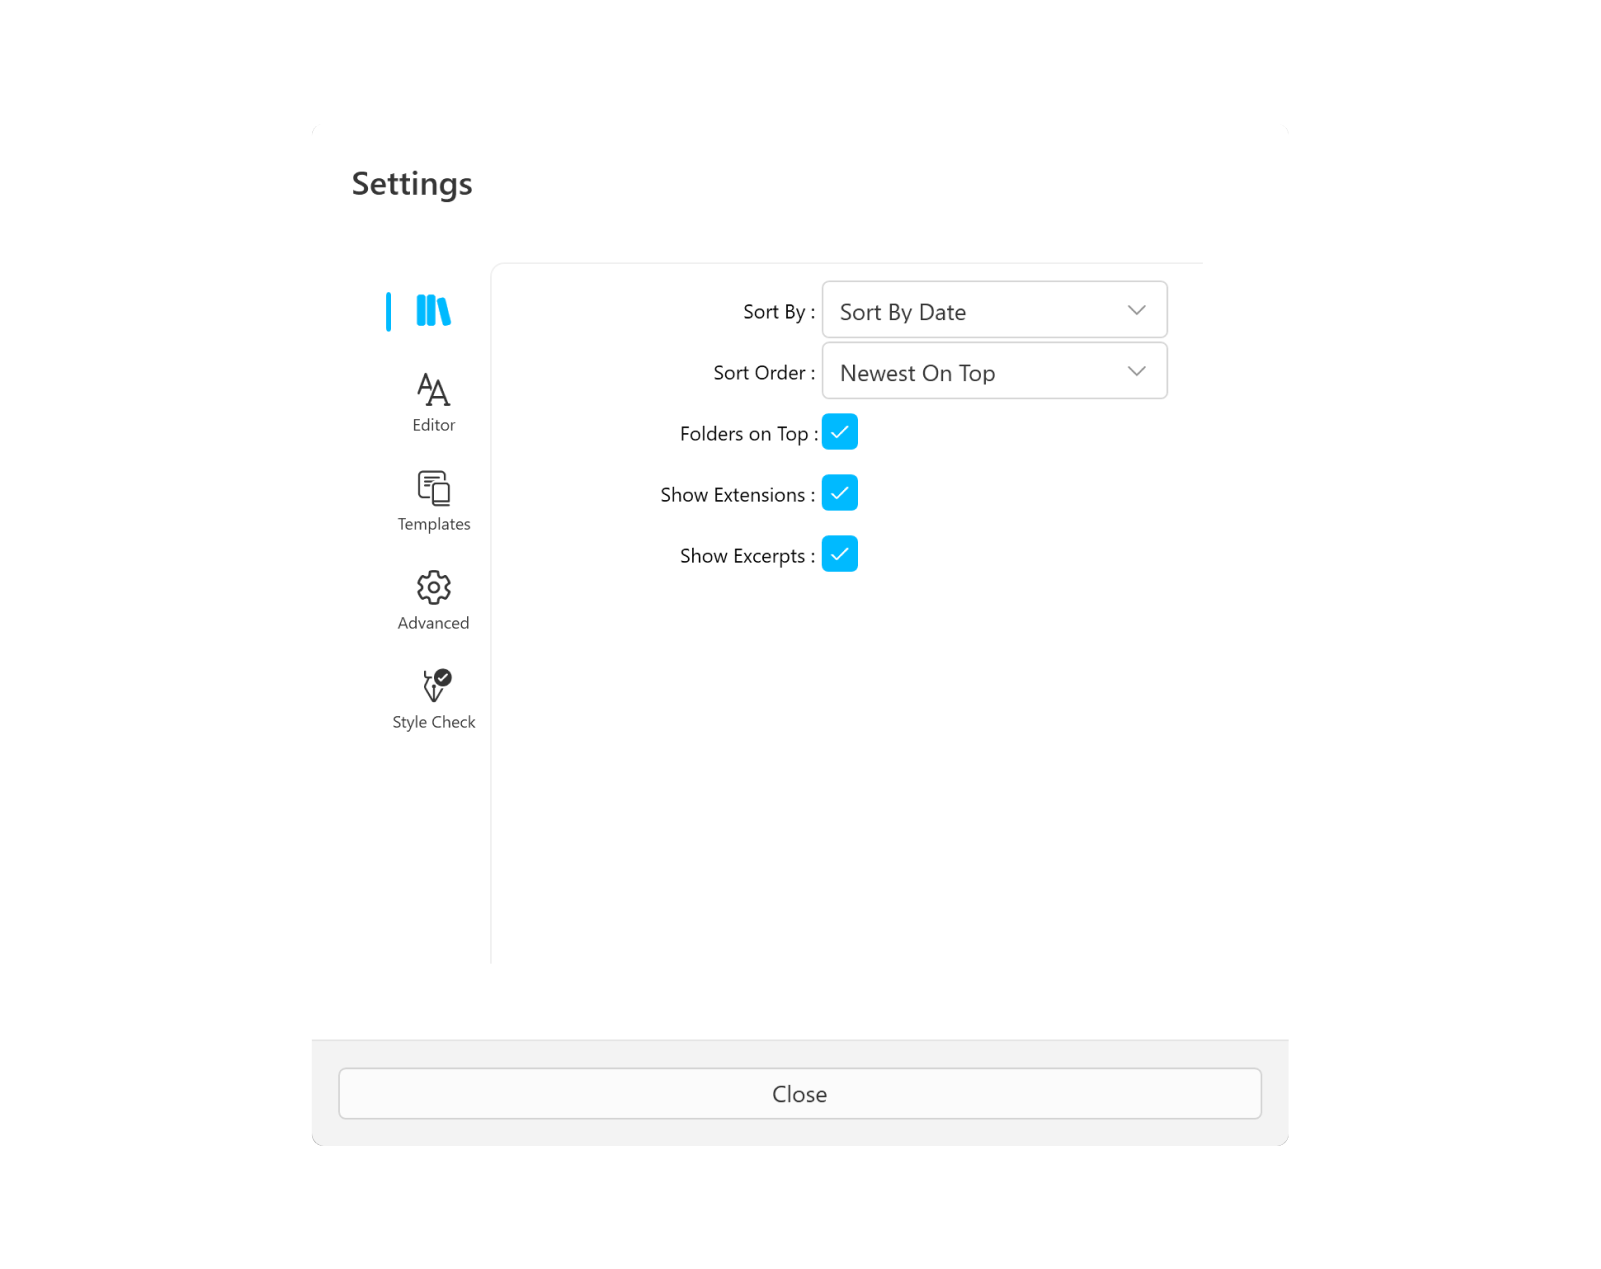
Library

Organizer
Show/hide Favorites, Smart Folders or Hashtags panels on the main Library screen. More about this on our dedicated page.
Files
Pin Folders to Top
Have some selected folders permanently at the top of the Library’s document list.
Show Text Excerpts
Show or hide excerpts of your documents’ text in the Library file list.
Sort By
Sort files by Date Modified, Date Created, Name or by Extension.
You can as well select if the Newest or Oldest file appears on top.
Show Date
Choose between showing documents’ creation date or last modified date in the Libray file list.
Editor
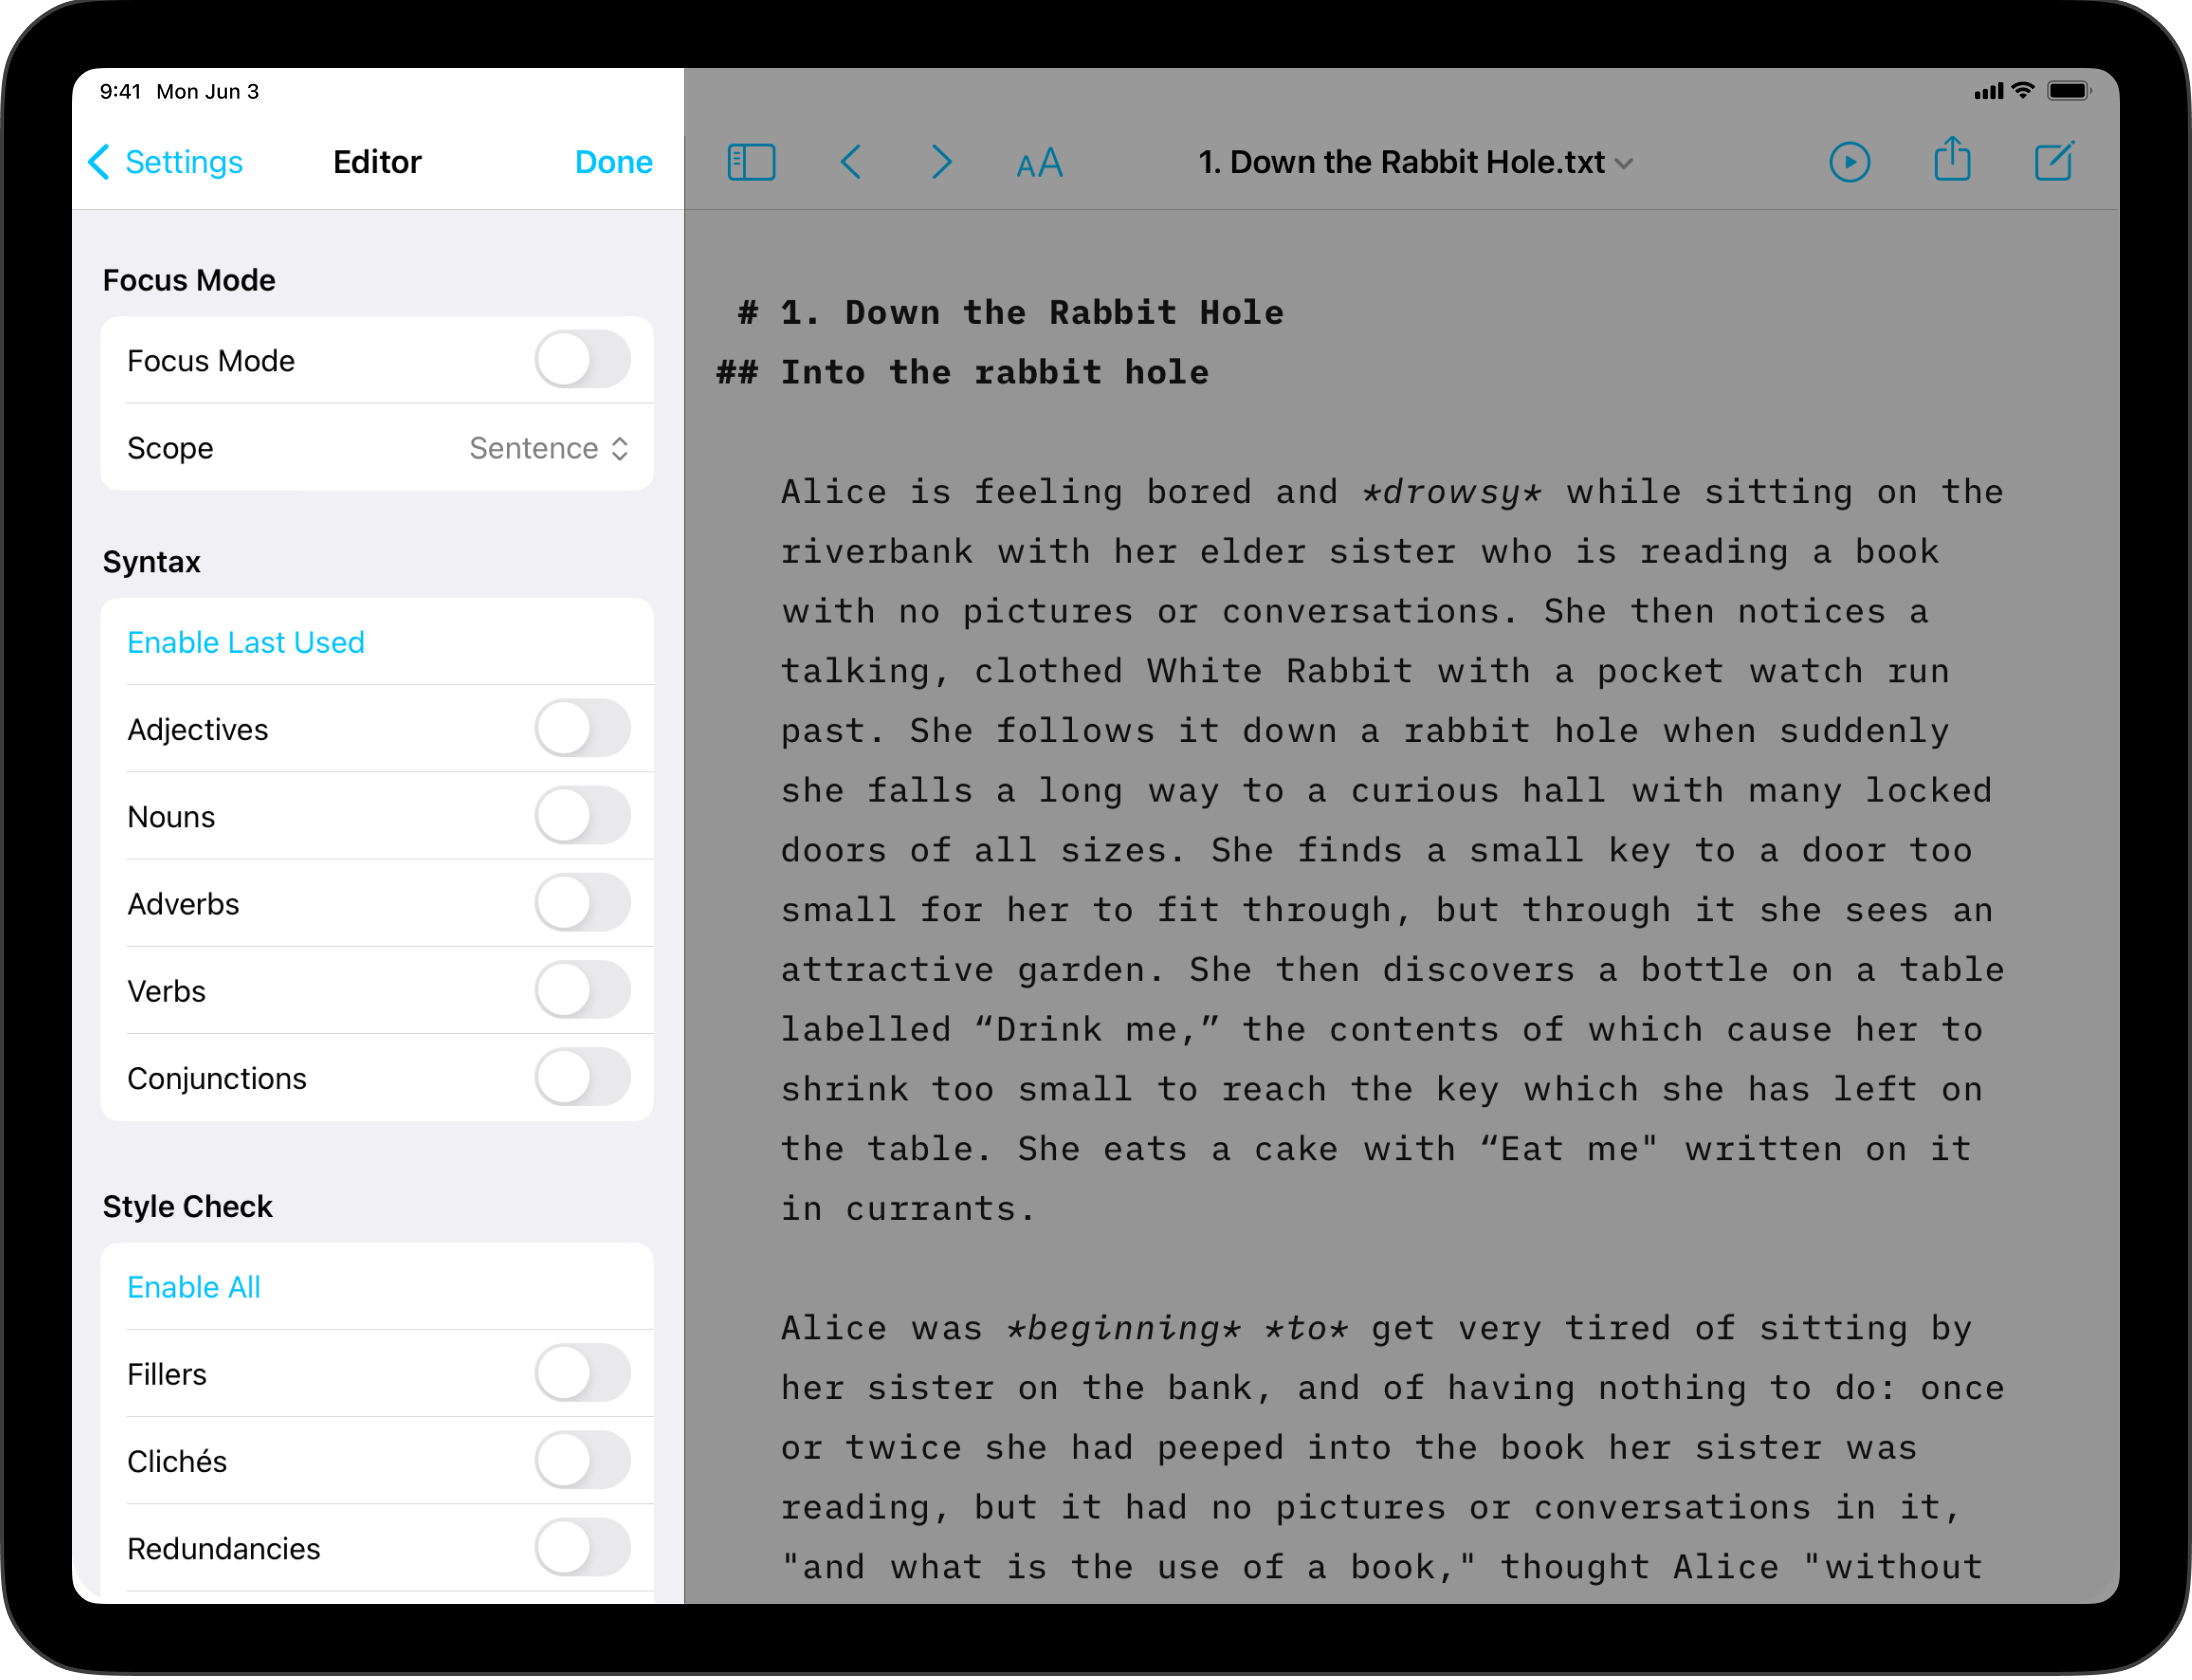
Focus Mode
Focus Mode
Turn Focus Mode ON or OFF.
Scope
Choose how much of your text to keep focused. You can choose to blur out everything but the current Sentence or Paragraph. Choosing Typewriter won’t blur out any text, but will keep the cursor centered vertically on the screen.
Syntax
Colorize the parts of speech in your document. This can help you spot weak verbs and superfluous adjectives. You can Enable All or select the ones you need among Adjectives, Nouns, Adverbs, Verbs and Conjunctions.
Style Check
Get suggestions on how to remove unnecessary fillers, clichés, and redundancies with Style Check. You can also add your own Custom Patterns here. Just like syntax highlight, you can Enable All or select the ones you need.
Authors
You can activate all the authors set in the Authors Setting or choose specific ones. For more information about this feature, visit this page: Authorship.
Text
Typeface
Select the font between iA Mono, Duo or Quattro.
Typography
Select language corresponding to the typography (for CJK optimization).
Maximum Line Length
Choose the maximum number of characters on a single line before it wraps to the next.
Indentation
Indent Using
Choose whether indents use Tab or Space characters.
Tab Key
Choose whether tab key always indents the current line—no matter the cursor position—or whether it always inserts a tab character at the cursor position.
Tab Width
Choose two, four or eight spaces for the appearance of tab characters in the Editor.
Indent Width
Choose two, four or eight spaces for the appearance of the indent width in the Editor.
Wrapped Line Indent Includes
Whitespace
Lines that wrap under a line that is indented with tabs or spaces will also indent to the same degree.
Markdown Block Markers
Lines that wrap under a line that begins with Markdown block markers, e.g., list markers (“- ”, “1. ”), will also indent to the same degree as the start of the text above.
Restore Defaults
Resets all Settings on this Indentation page to their defaults.
Appearance: Highlight Color
Text surrounded with the ==highlight syntax== will use this color in both Editor and Preview.
You can choose between yellow, orange, pink, purple, blue and green.
Completed Tasks
Modifies the appearance of completed tasks in both Editor and Preview to either Strikethrough, Fade the text, or both.
Text Input
Enable or disable Autocorrect and Predictive text.
Check Spelling
When turned on, typos in the Editor will be underlined in red.
Smart Copy/Paste
Accounts for spaces in the content so you don’t end up with two-space gaps in the text.
Smart Quotes
Automatically replaces straight quotes with curly quotes when typed into the Editor.
Smart Dashes
Automatically replaces two hyphens with an emdash.
You can learn more about Smart substitutions and automations on this dedicated page.
Completions
Insert and type-over matching brackets
When opening a bracket ( [ or {, a closing bracket will automatically appear.
Wrap selection in typed brackets
When selecting a text and pressing [ ( or {, the selected text will be wrapped like [text] (text) {text}.
Authors
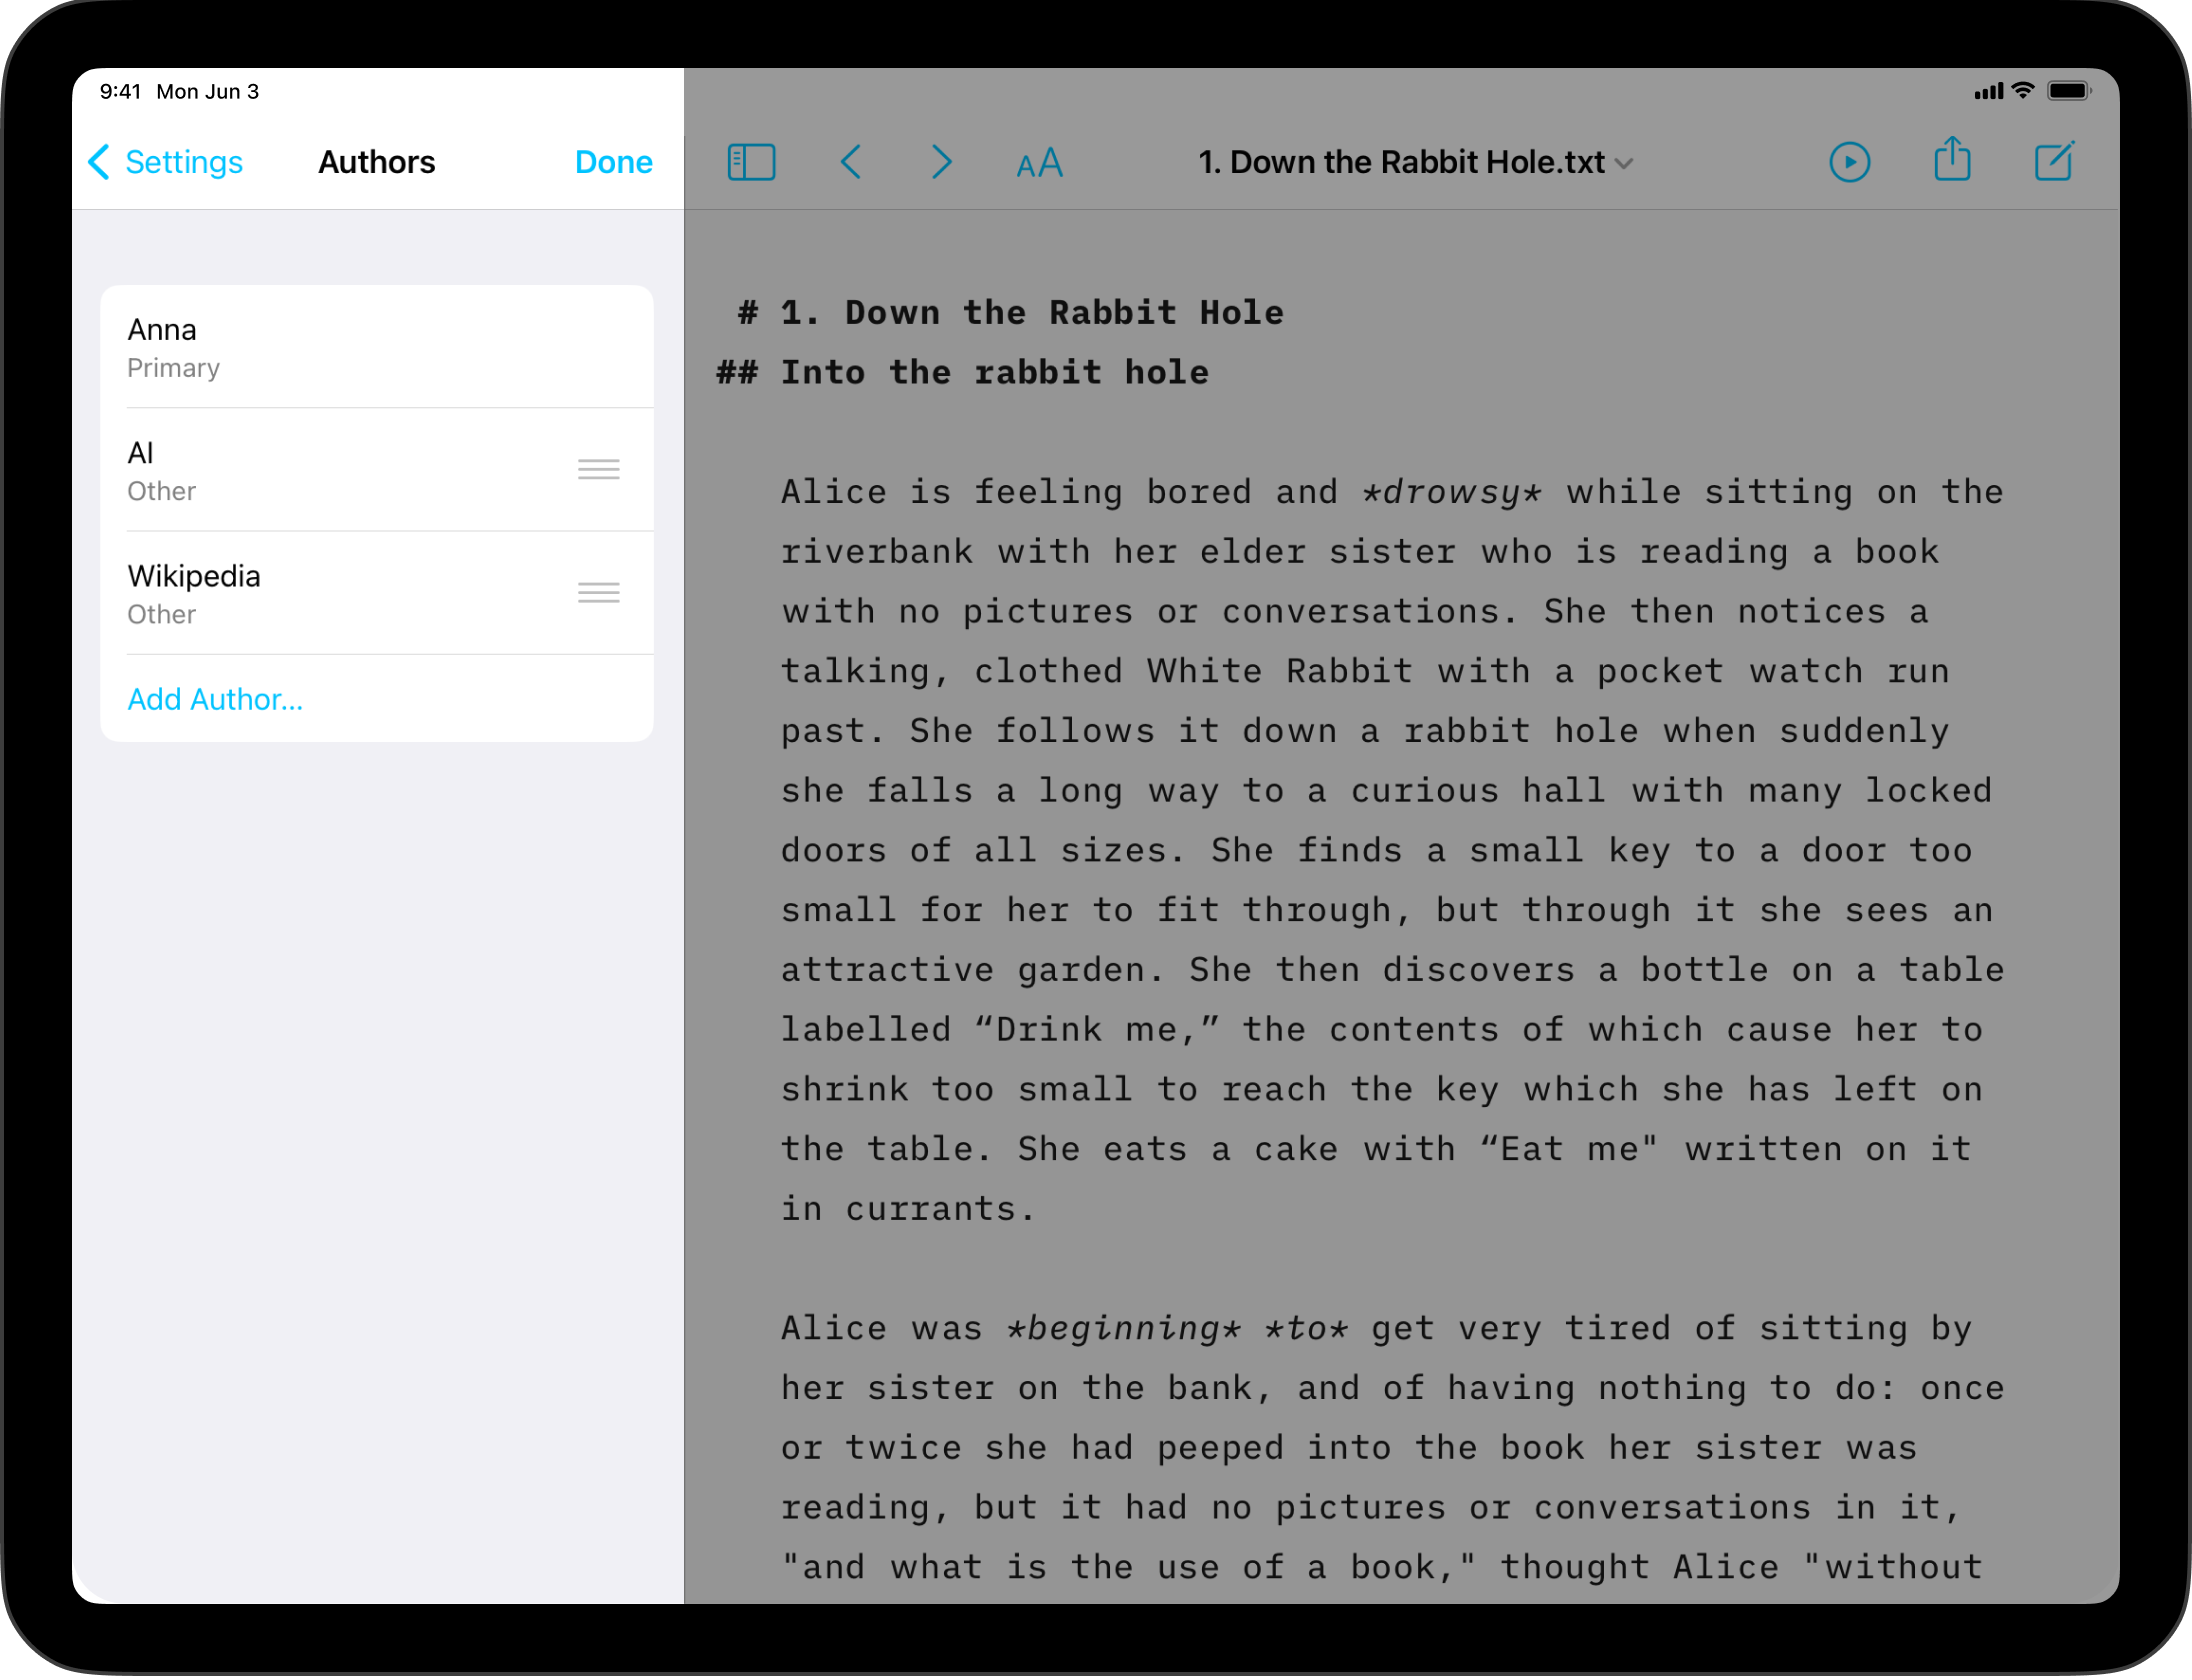
Add or remove authors from global list. Select an author’s name to edit name, identifier and kind of author.
More about the Authorship feature here.
Keyboard
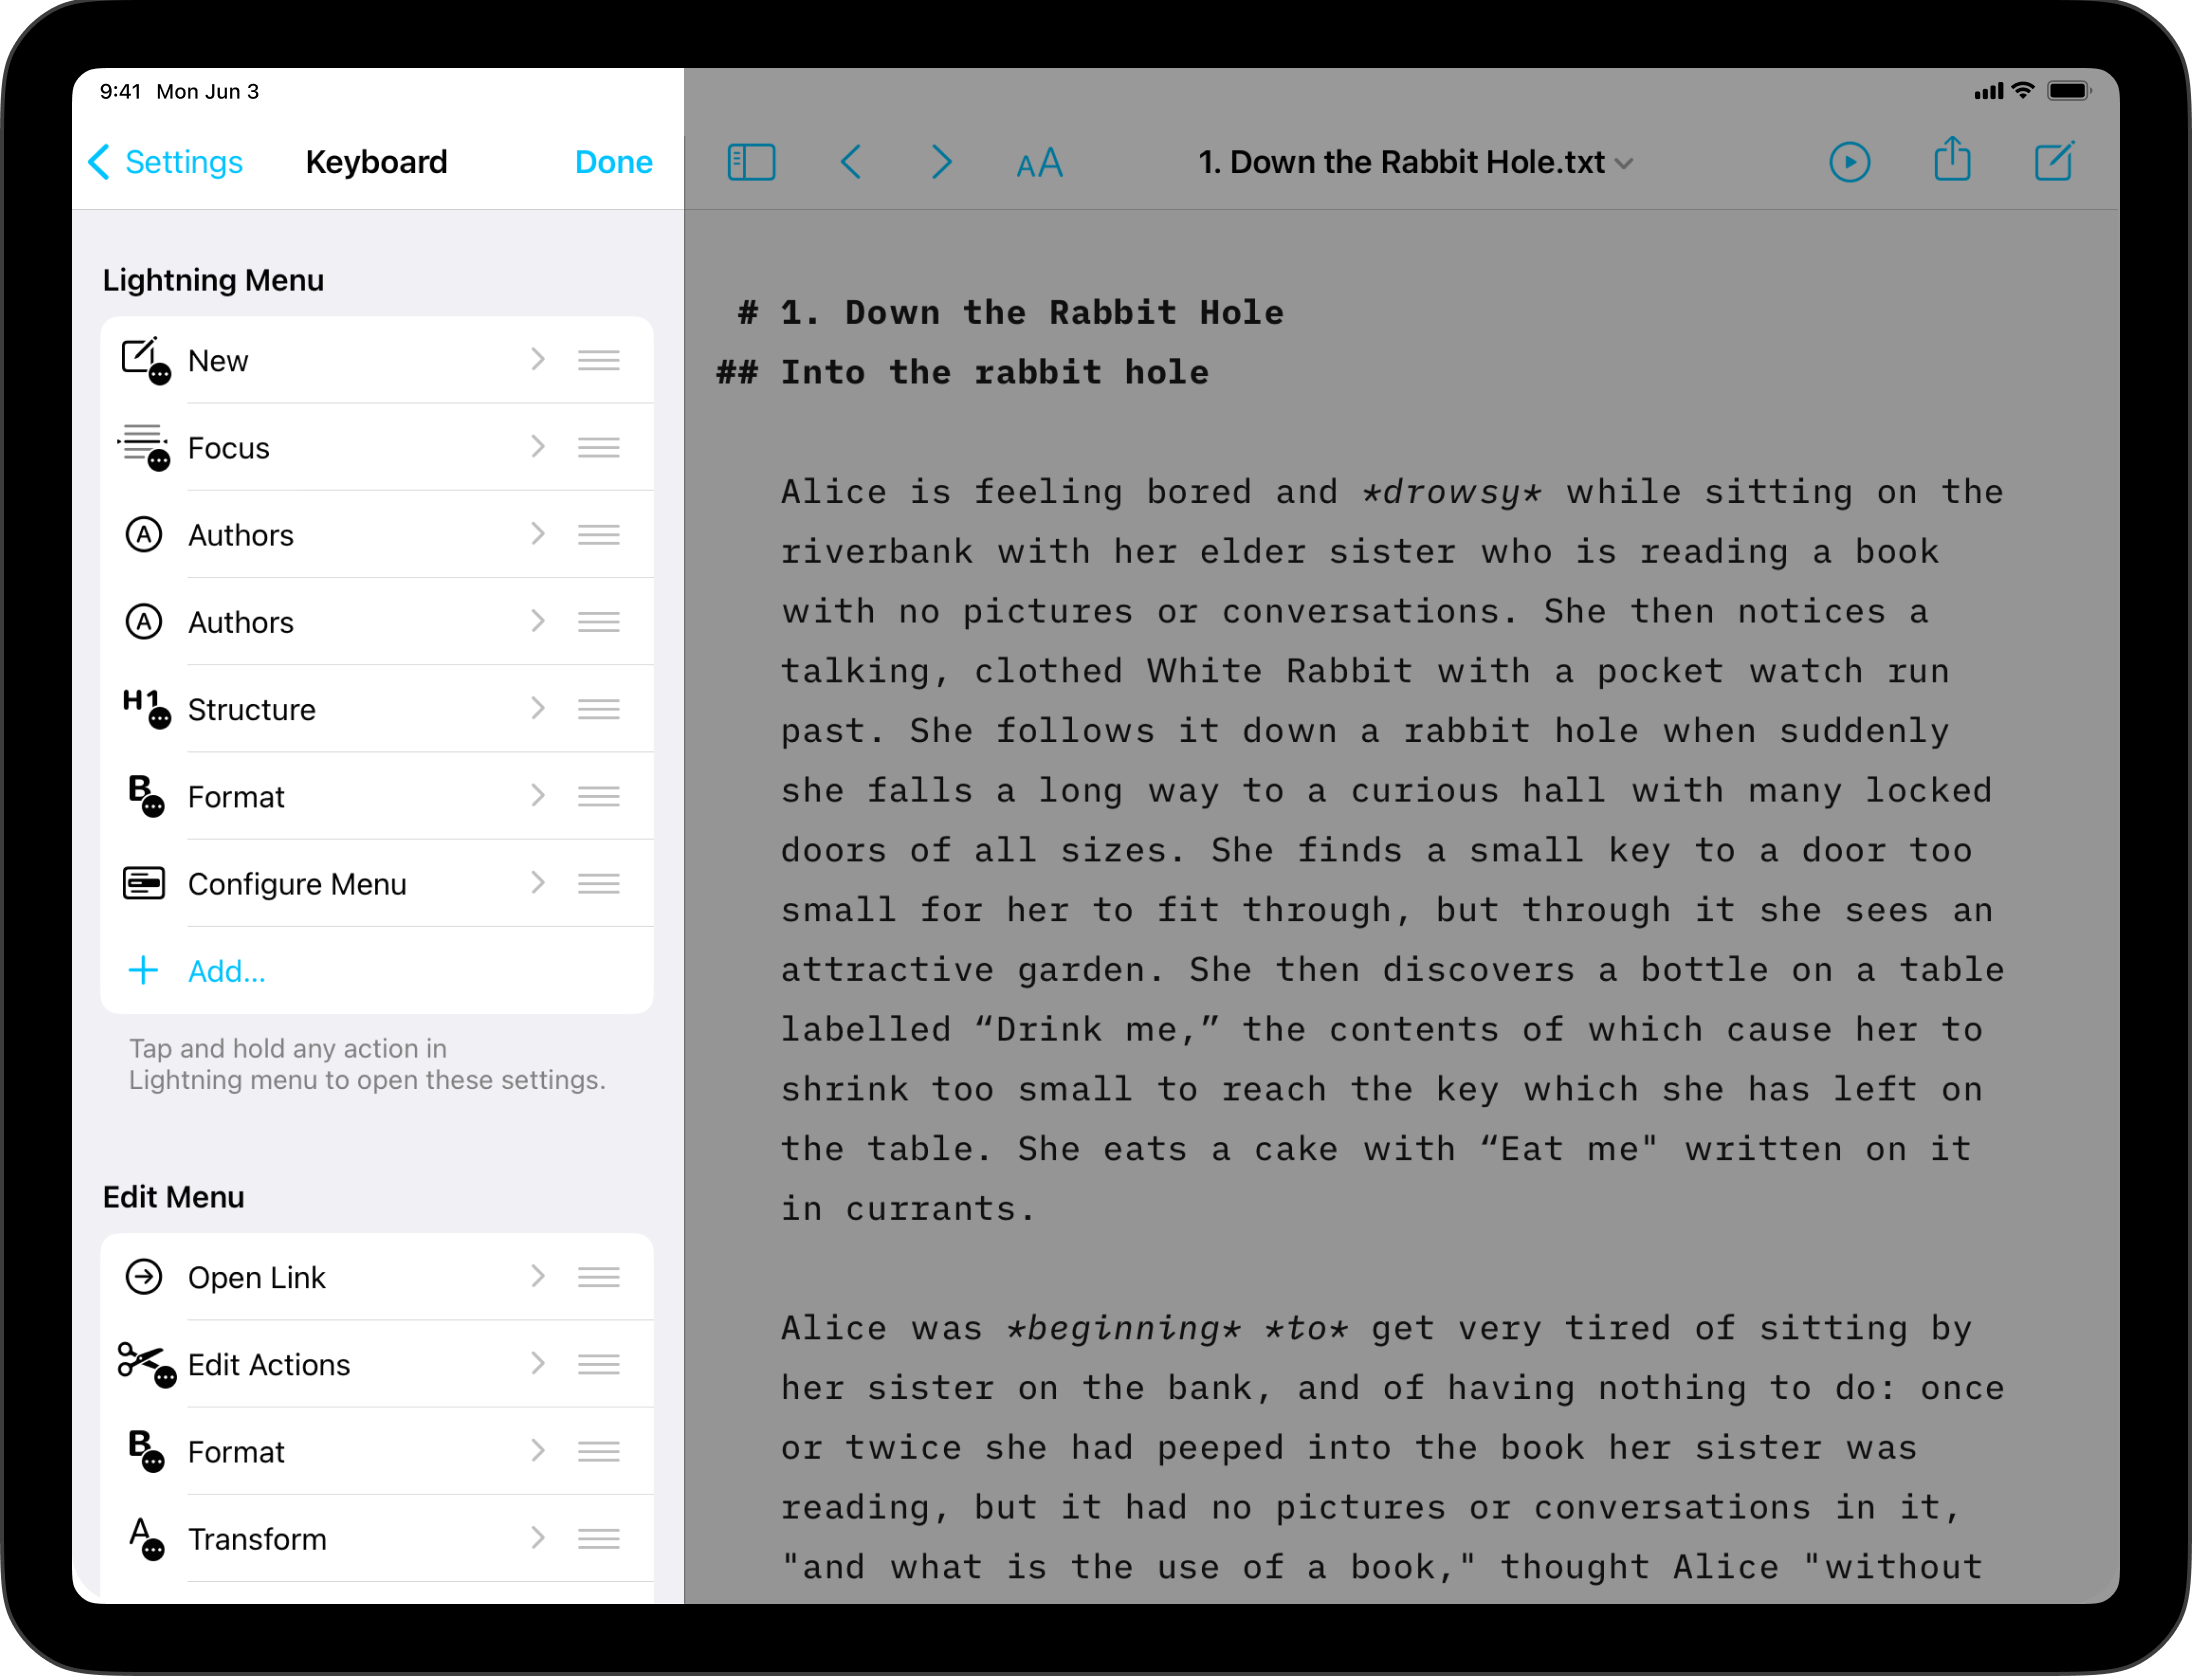
Lightning Menu
On iPadOS 15+, iA Writer includes a Lightning Menu in the Keyboard Bar. Here you can choose which shortcuts appear in the menu when tapped.
Edit Menu
In Writer 7+ you can choose which shortcuts appear in the Edit menu (popover) when working with selected text.
Hardware Keyboard
Show Keyboard Bar
The Keyboard Bar appears above the software keyboard and provides shortcuts to common functions. When a hardware keyboard is connected keyboard shortcuts are available, so you may choose to hide the Keyboard Bar here.
Command Keyboard
Choose to show or hide the Command Keyboard in the Keyboard Bar and modify its layout.
Templates
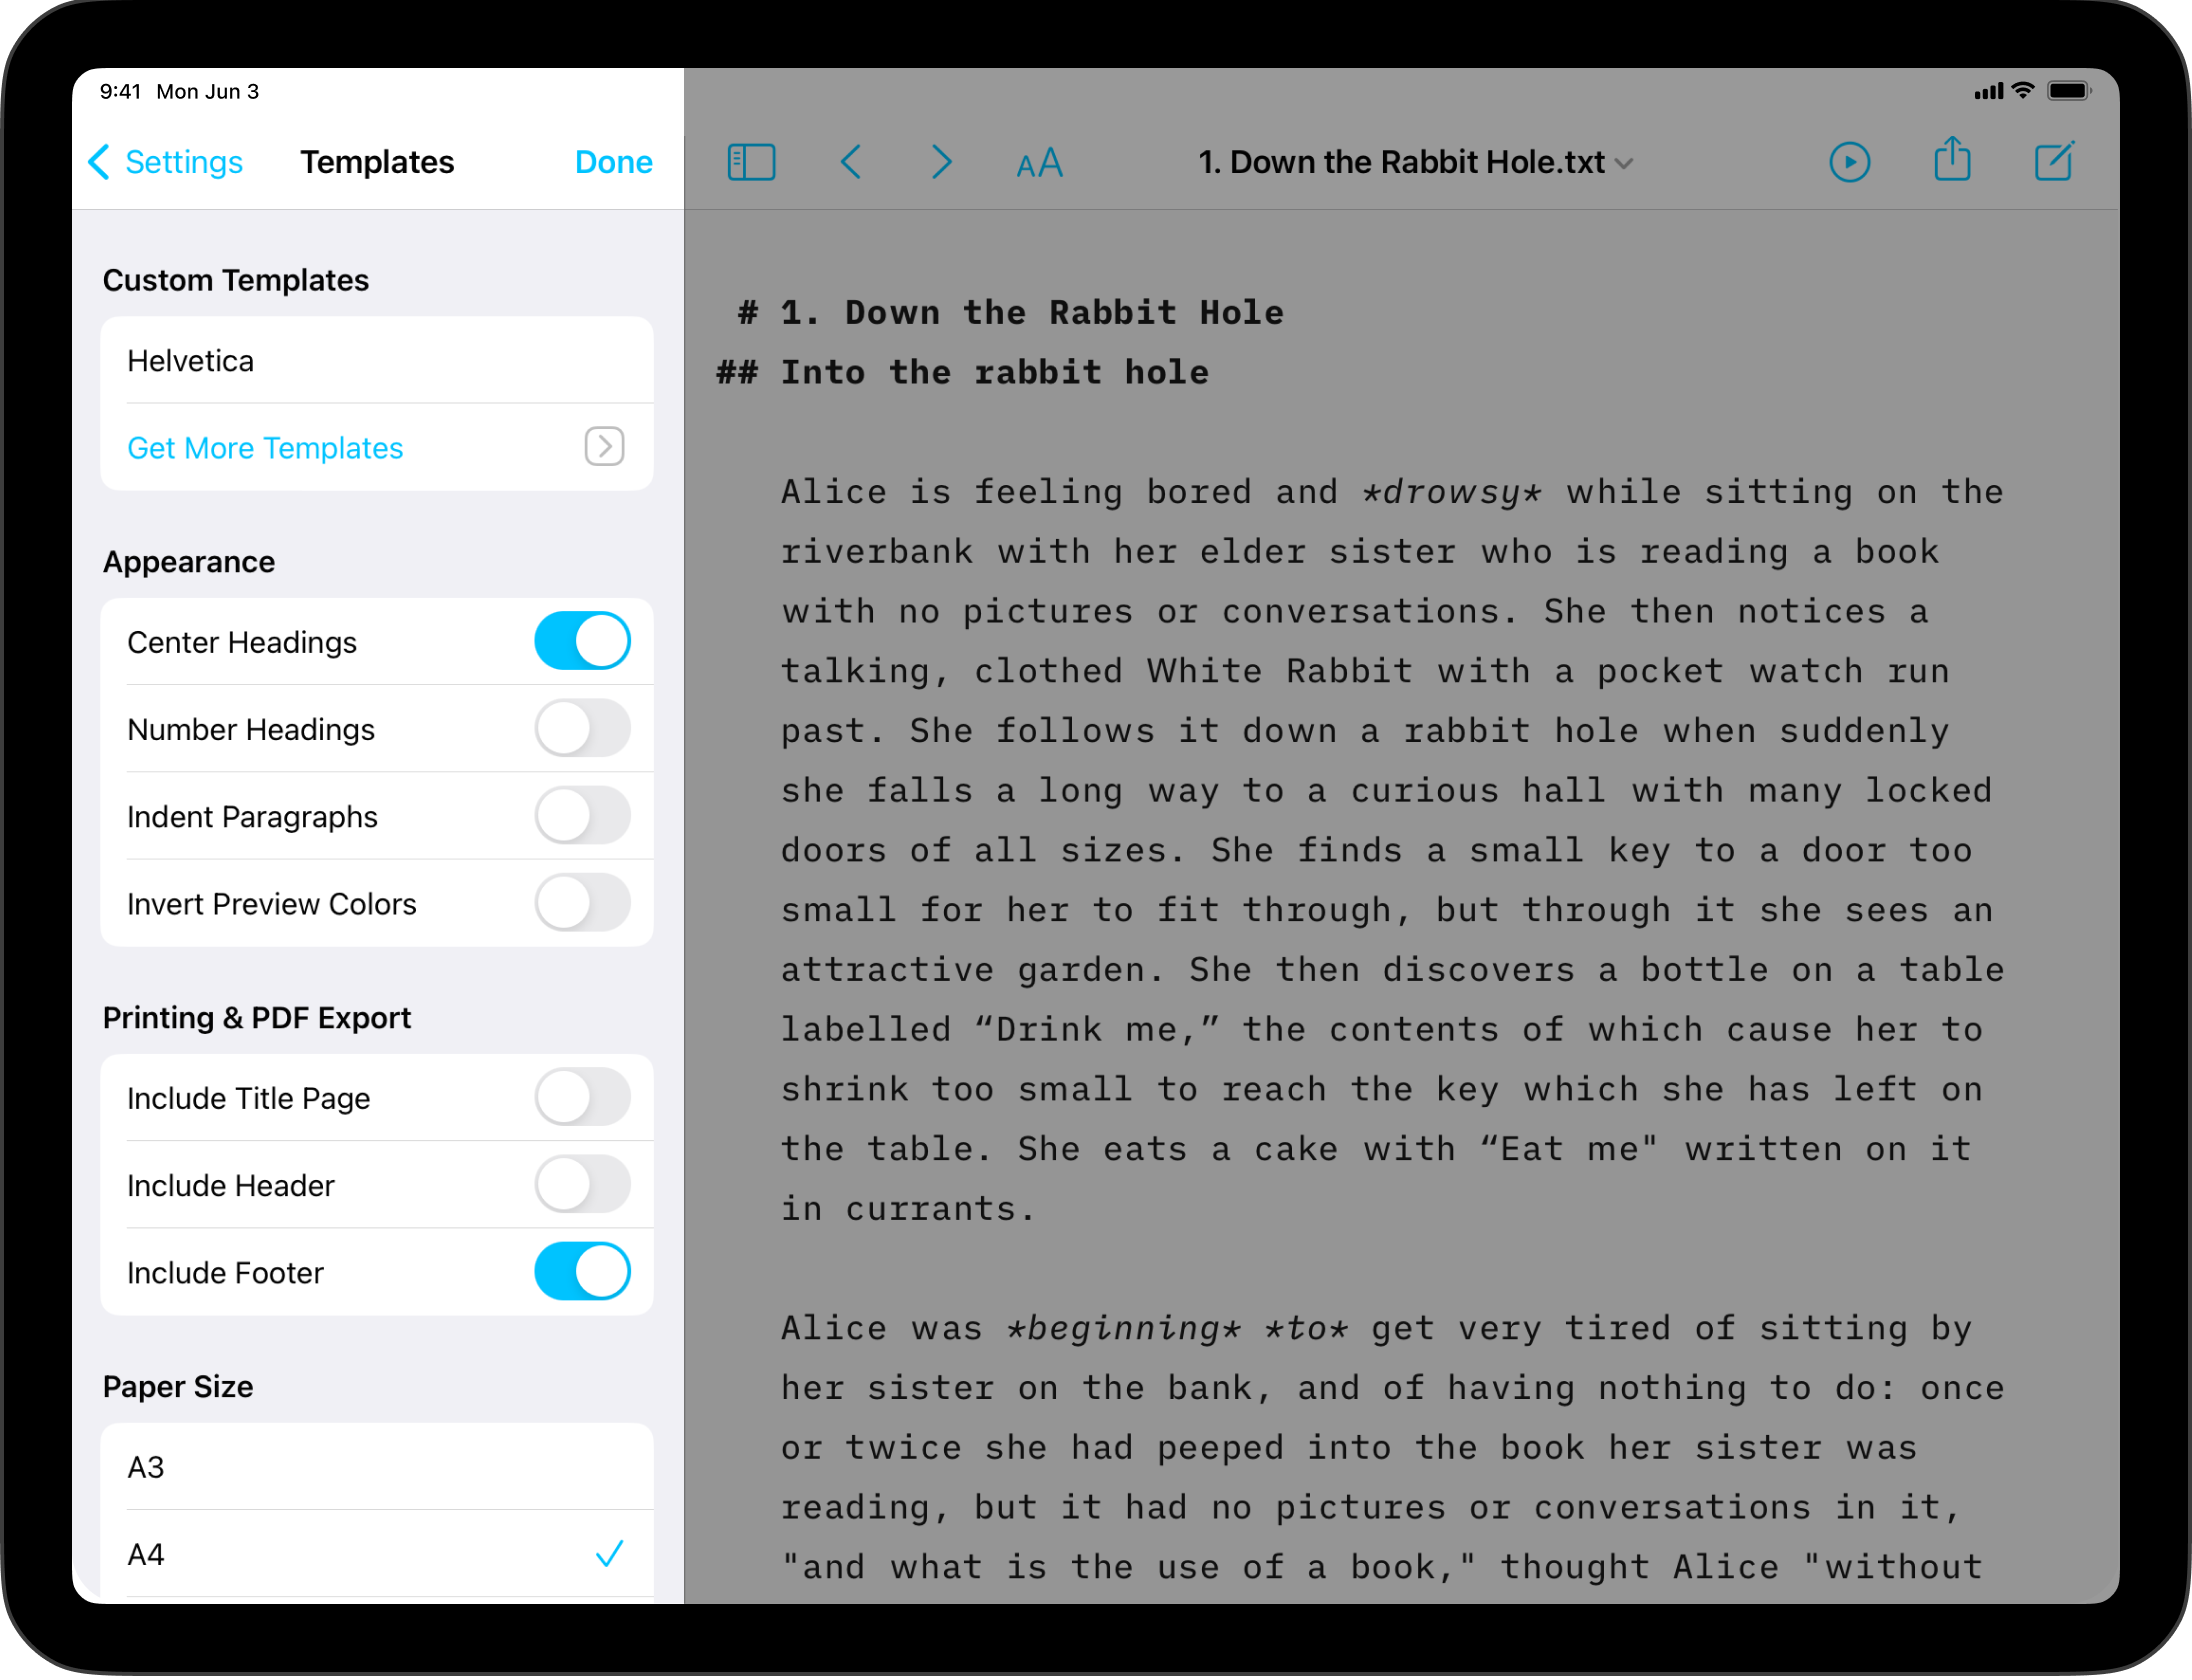
Custom Templates
Here you can add Templates , or remove any previously installed custom templates by swiping their entry in the list to the left.
Appearance
Center Headings
Choose between centered or left-justified headings in the templates.
Number Headings
Headings will be automatically numbered in the Preview.
Indent Pargraphs
Choose to indent new paragraphs or separate them with an empty line.
Invert Preview Colors
Preview will use the inverted colors of the Editor. This is useful to tell at glance whether you are in Preview mode on iPhone.
Printing & PDF Export
Configure header, footer and title page settings for exported/printed documents.
Paper Size
Configure paper size between A3, A4, A5 and US letter format (print and PDF export).
Markdown

Processing
Determines how content from the Editor is processed by the Markdown parser to display content in Preview.
Smart Punctuation
When turned on, straight quotes in the Editor will automatically be converted to curly quotes in Preview. Likewise, two hypens immediately following each other will be shown as an emdash in Preview. You can learn more about Smart substitutions and automations on this dedicated page.
N.B. This is distinct from the Editor setting for Smart Quotes and Smart Dashes. Those will modify the characters themselves in the Editor, while this function only changes the appearance in Preview and PDF export.
Single Return Starts a New Paragraph
Traditional Markdown requires two returns to complete a paragraph. i.e., one empty line between paragraphs or any other element. This setting lets you use a single return instead, if you prefer.
Library Paths
You can configure how paths for Wikilinks and Content Blocks will appear in the Editor here.
- “Shortest” will use the smallest path possible in any situation, often simply the file name:
Alice in Wonderland. - “Relative” will use a relative path, using
../to indicate folders above:../Classics/Alice in Wonderland - “Absolute” will use the full explicit path to the document:
/Books/Classics/Alice in Wonderland
Wikilinks, Hashtags, Autolinks
Output & rendering settings for wikilinks, hashtags and autolinks. You can configure HTML, Other (copying, exporting and publishing), and Preview behavior all independently.
Wikilinks
Depending on the output (HTML, Other or Preview), you can choose to show Wikilinks as the source text appearing in the Editor, text using the filename or optional title, e.g., [[Alice in Wonderland|My Optional Title]], or as a <span> element or as a link.
Hashtags
Hashtags can be shown as the source text as it appears in the Editor, as a <span> element, as a link, or removed entirely from the output.
Autolinks
Autolinks can be shown as the source text as it appears in the Editor or as a link.
Metadata
Add or configure existing custom Metadata that is global for all files. “Author” is the only default metadata iA Writer uses and it will be included on Title Pages in Preview and PDF export if present.
URL Commands
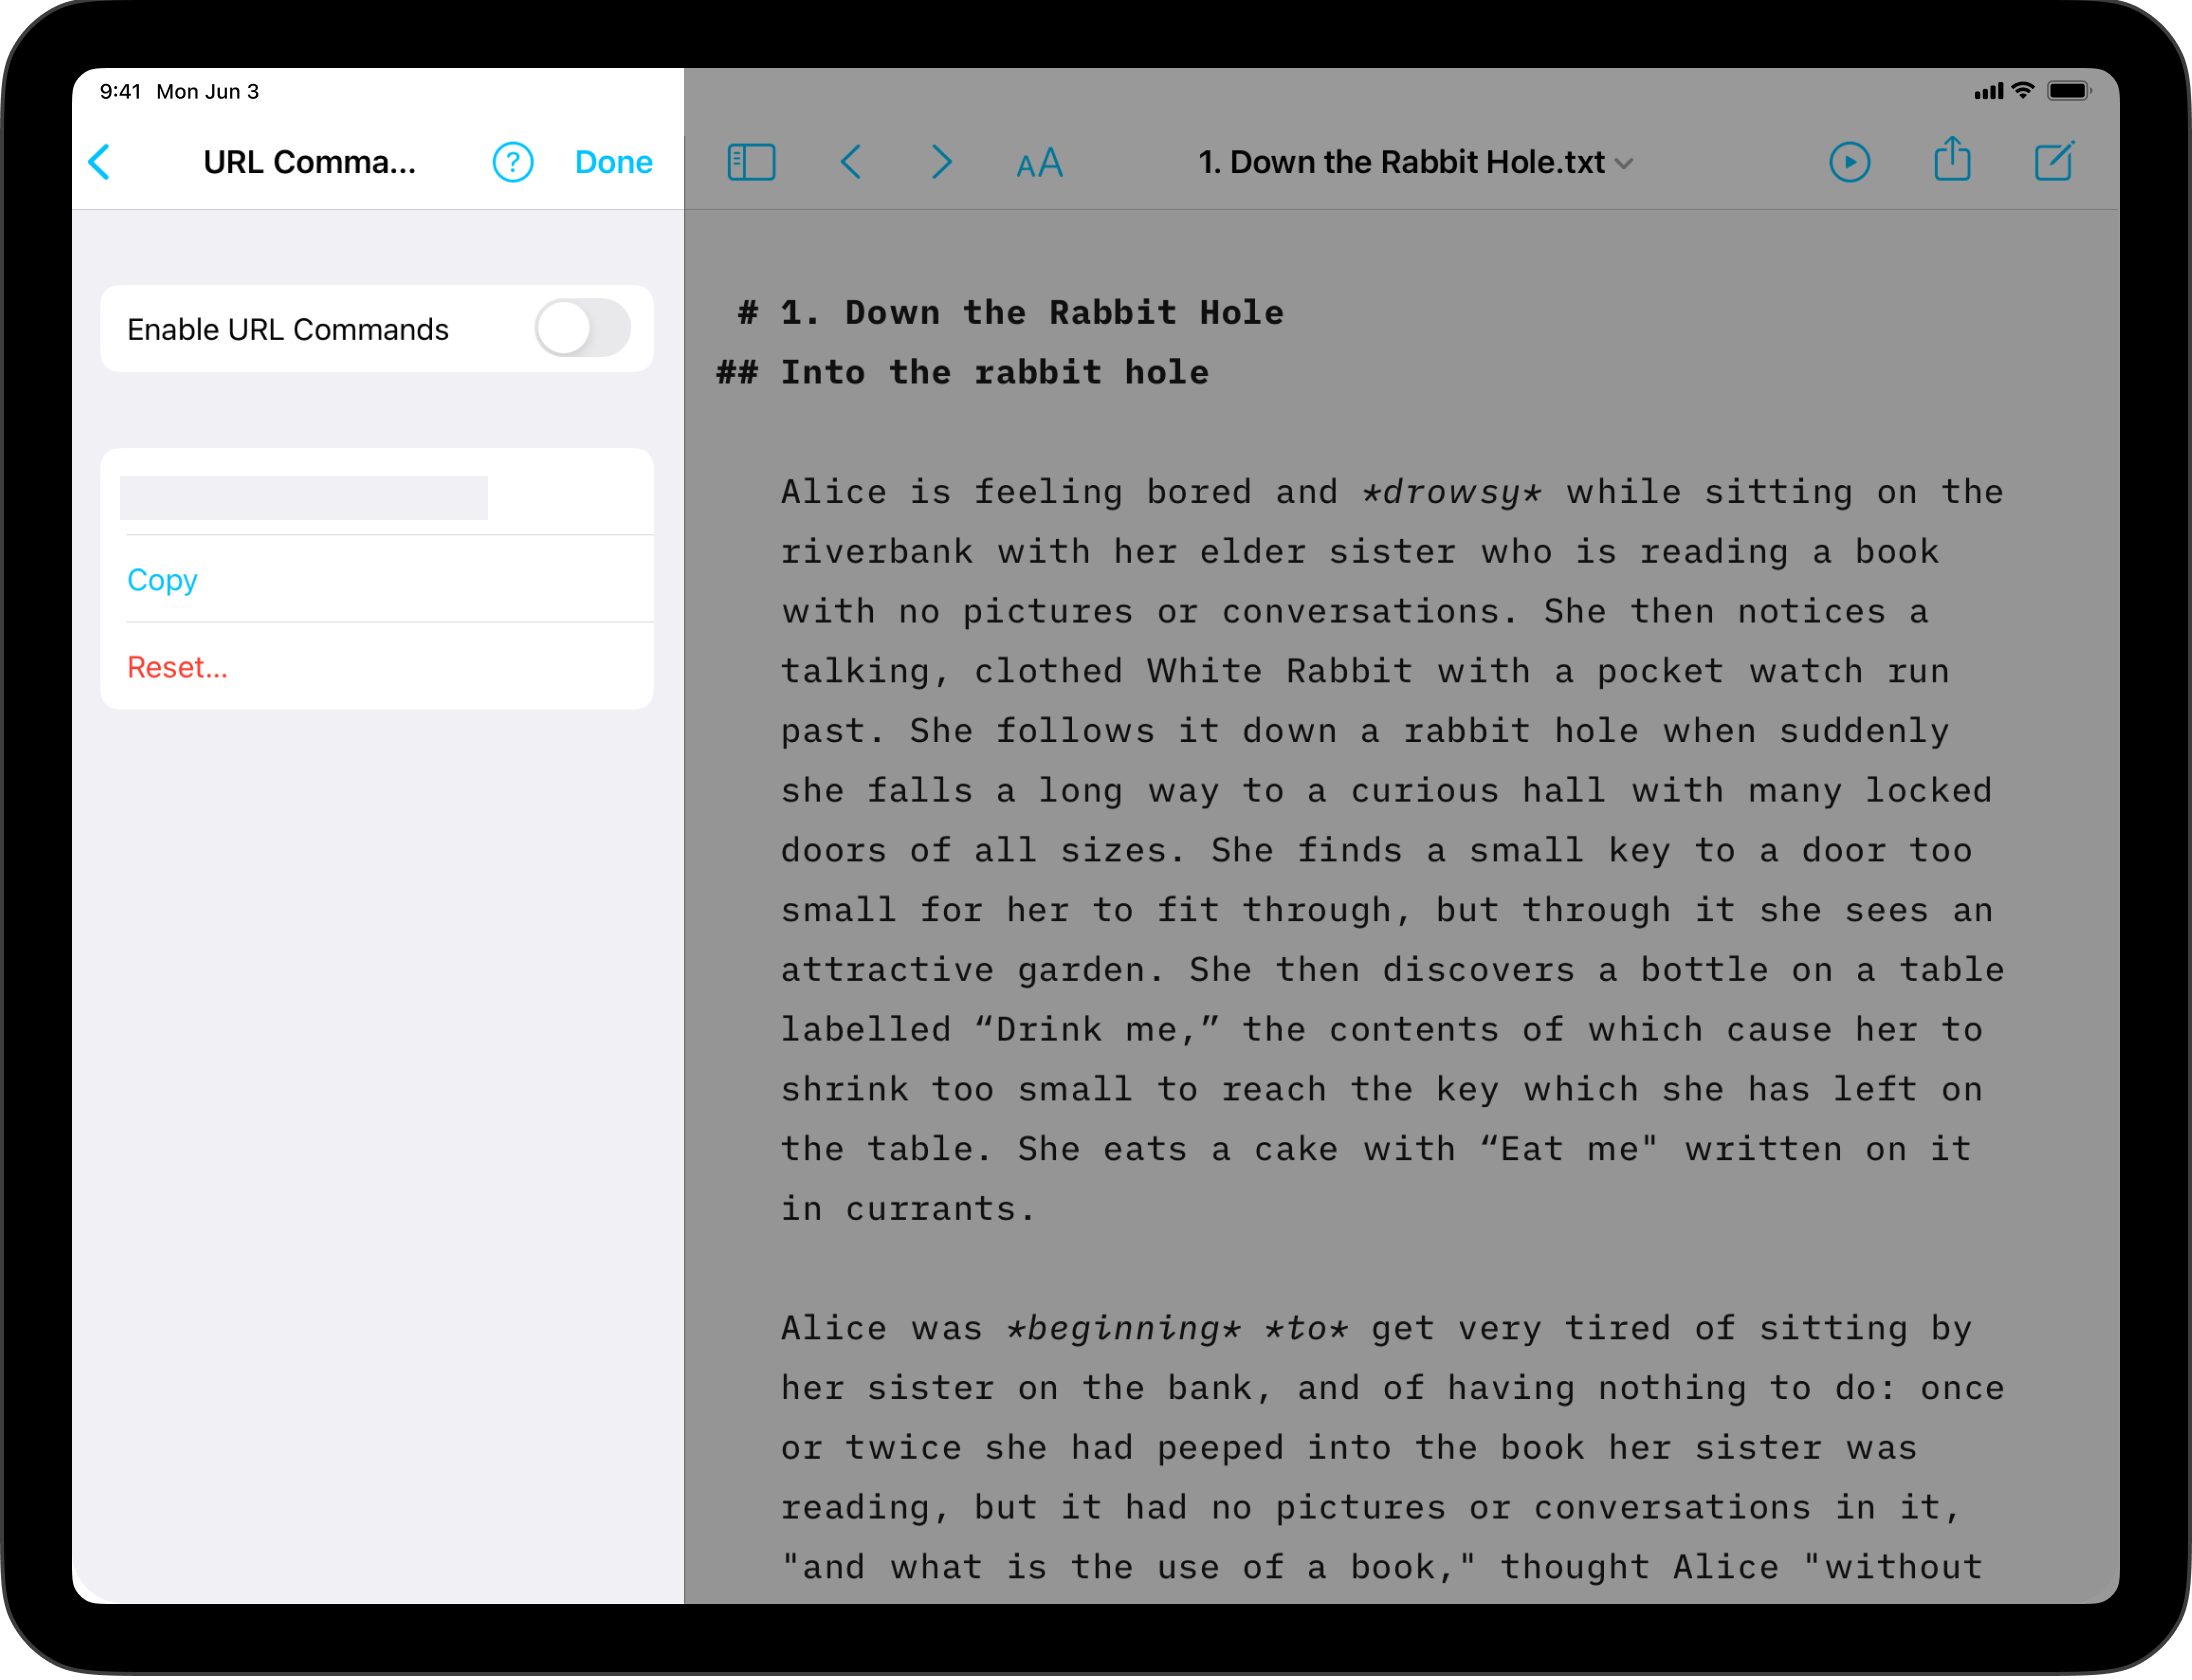
Enable URL Commands: Here you can turn on support for URL Commands and copy or reset the Auth Token.
Settings

Here, you can navigate to the iPadOS settings associated with the app, including language preferences, and app version information.